Printing Worksheets
Introduction:
An important aspect of worksheets is printing them so the look professional and display data in a manner that is easy to view and understand. The print setup process will cover the most common places that you will prepare your worksheets for printing which begins with Backstage view found on the File tab of the Ribbon. Backstage view has a print settings menu, but we will also cover the Page Layout tab on the Ribbon and the Page Setup Dialog Box along with placing Headers and Footers on a worksheet.
Learning:
Print Setup
Print setup is completed using Backstage view found on the File tab and from the Page Layout tab on the Ribbon. Each option provides the user with a multitude of options to format a worksheet for printing.
File Tab
The File tab on the Ribbon brings you to the Backstage view where you see a menu on the left pane and options on the right pane depending on the menu option selected. In this instance we are going to focus on the Print menu option.
Backstage View
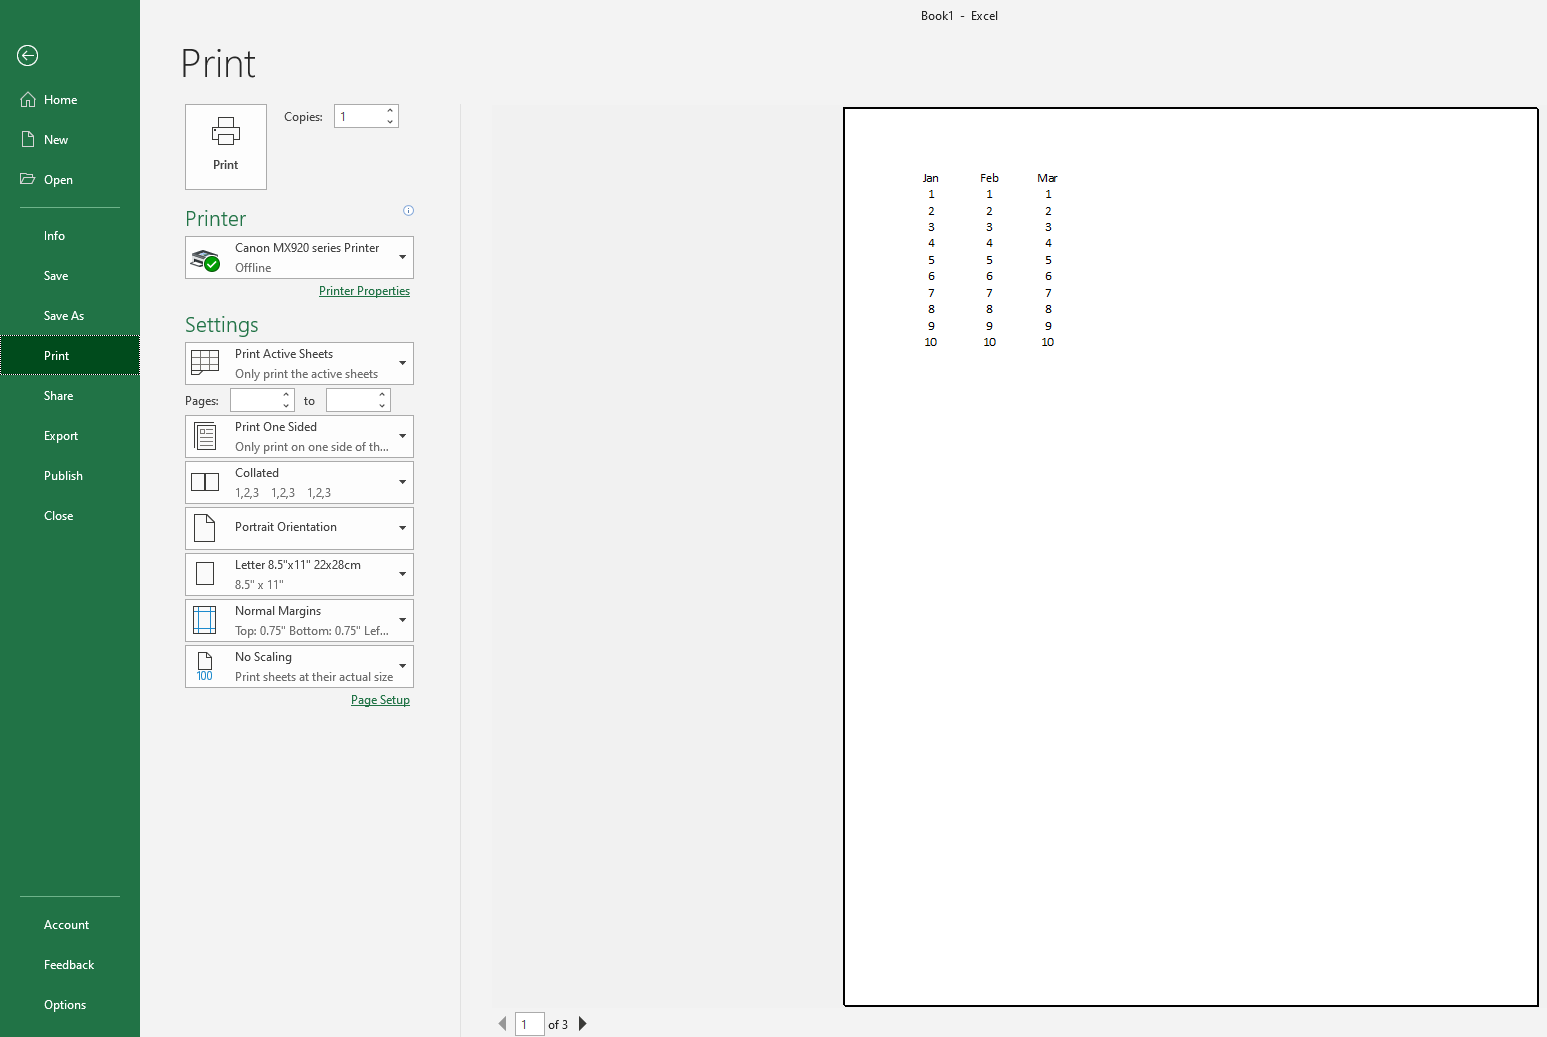
Backstage view is where you can click Print in the menu options on the left pane to see the preview page in Excel. This print preview screen that displays your worksheet as it will print with its current settings. The menu options on the Print screen provide you to select the number of copies to print, the ability to choose a printer, and a Settings menu where you can control a number of options such as layout, margins, scaling, and page setup.
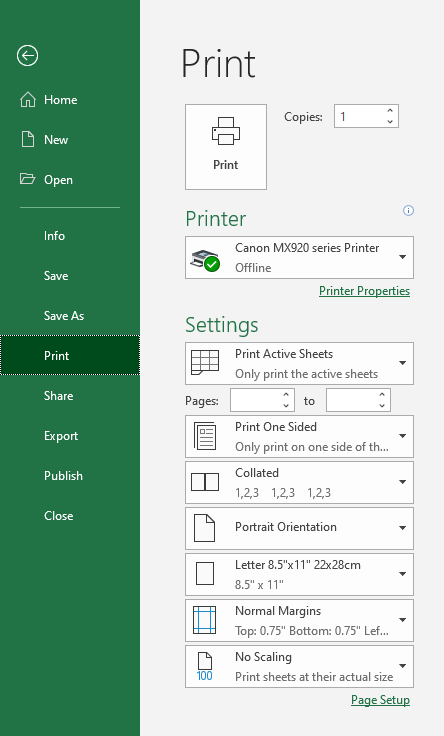
Settings Menu
The Settings menu provides a multitude of options for printing. This includes the ability to determine which worksheets in a workbook you would like to print in the Print Sheets menu option. There is also an option to print on both sides of a page if your printer has that option using the Print Side menu, along with collating your worksheet pages so they print in the order you desire utilizing the Collate menu. There is an option to change the orientation of the worksheet from portrait to landscape using the Orientation menu, and to choose the page size for your printer (standard 8.5” x 11” is defaulted). You can also adjust the margins and scaling of your printed worksheets using the Margins and Scaling menus.
Orientation comes in two forms, portrait (default) and landscape. Think of a picture of a person (portrait = taller than wider) versus a picture of the Grand Canyon (landscape = wider than taller) as the differences between the two orientations. Changing orientations during printing may also keep data that has spilled onto other worksheets on a single page.
Margins in Excel are set to Normal by default, and there are two additional settings for margins available, which are Wide and Narrow. Each gives a different amount of space between the top, bottom, left, and right borders of your worksheet when it is printed. Adjusting margins during printing may keep data that has spilled onto other worksheets on a single page.
Scaling a worksheet changes the size of columns or all the data so they fit on a single page for printing. The use of this tool can be detrimental to reading data if too much data is shrunk to fit on a single page.
At the very bottom of the Settings menu options there is a link to the Page Setup Dialog Box which allows easy access to this feature found on the Page Layout tab on the Ribbon right from Backstage view.
Page Layout Tab
The command buttons found in the Page Setup group on the Page Layout tab of the Ribbon provide easy access to control how your worksheet appears when printing. The Page Setup group contains command buttons for Margins, Size, Print Area, Breaks, Background, and Print Titles. The Page Setup group also has a link to the Page Setup Dialog Box in the lower right corner that contains additional commands for print setup. For our work in this course we will mainly focus on the Margins and Orientation commands.

Page Setup Dialog Box
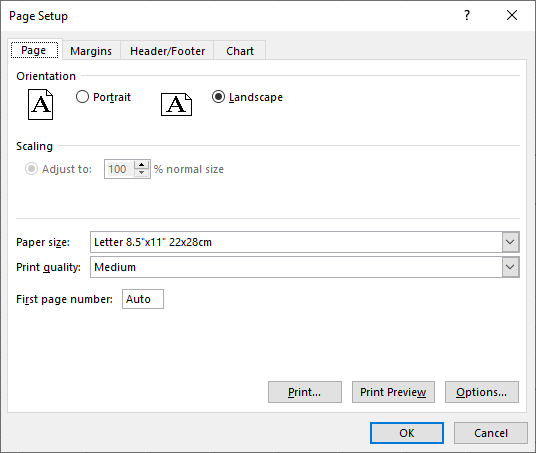
The Page Setup Dialog Box provides an easy way to adjust the Page and Margins of a worksheet.

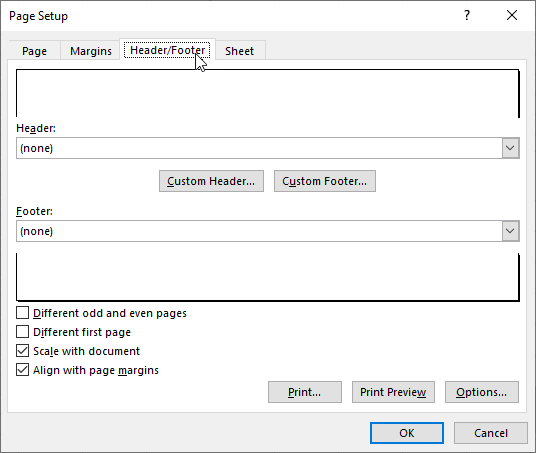
The Page tab provides the ability to adjust scaling, orientation paper size, print quality, and page numbering including additional options and to open Print Preview. The Margins tab gives the user the ability to manually adjust the margins and to Center on Page. Likewise, the Header/Footer tab provides the user the ability to add Headers and Footers to a worksheet from the same menu. The Sheet tab contains additional options for working with worksheets.
Page Centering
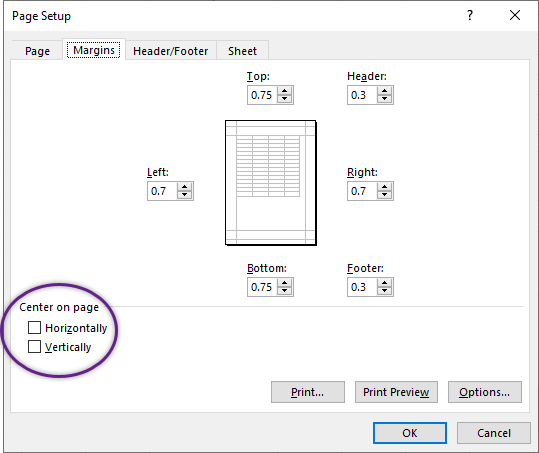
The Center on Page menu on the Margins tab provides the user the ability to center the document Horizontally, Vertically, or both. This give the user the option to move smaller sets of data from the upper left corner to a different position on a printed worksheet. The buttons when checked off will give the user a preview of how the data will be arranged when printed.
Worksheet Setup
The ability to add headers and footers to worksheets gives the viewer additional information about the worksheet data that appear on printed worksheets. The header is printed on the top of the worksheet and the footer is printed on the bottom of the worksheet. These are manually entered options and come with many preset options for displaying data along with the ability to customize a header or footer.
Headers and Footers
Headers and footers can be added in multiple ways. The first is using the Header & Footer command button in the Text group of the Insert tab of the Ribbon.

The second is using the Page Setup Dialog Box found in either the Backstage Print page under the Settings menu or in the Page Setup group on the Page Layout tab of the Ribbon. Lastly, headers and footers can be added using the Page Layout button on the Status bar near the Zoom slider.
When entering a header or footer you are provided with multiple command buttons like the Page Number, Number of Pages, Current Date, Current Time, File Path, File Name, Sheet Name, Picture, and Format Picture buttons. The most used buttons will be briefly described below.
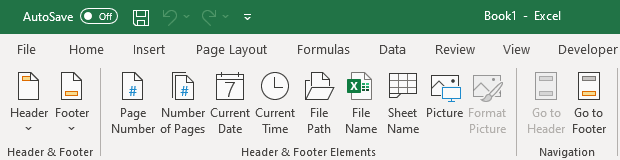
Page Number: This button inserts a page number using the &[Page] code, which will display a page number when printed.
Number of Pages: The button inserts the number of pages using the &[Pages] code, which will display the number of pages in the workbook.
Current Date: This button inserts the current date using the &[Date] code, which will display the current date when the workbook is opened not the date it was created.
Current Time: This button inserts the current time using the &[Time] code, which will display the current time when the workbook is opened not the time it was created.
File Path: This button inserts the location of the file using the &[Path]&[File] code, which will display the directory path on the computer when it was printed.
File Name: This button inserts the workbook name using the &[File] code, which will display the workbook file name when printed.
Sheet Name: This button inserts the worksheet name using the &[Tab] code, which will display the worksheet file name when printed.
Summary:
Printing workbooks and worksheets that look professional and are easily readable is an important aspect of working with Excel and presenting data. The adjustments made during print preparation using the print setup options gives the Excel user the ability to manipulate the display of data to meet the needs of the viewer. This includes the addition of additional data using headers and footers to provide a more in-depth knowledge of the data and its curator.
Sources:
IDM