Cell Formatting
Introduction:
Working with cells and cell ranges in the formatting, alignment, and placement of data makes Excel a powerful tool for working with data as it is highly customizable. Displaying data in cells using a combination of alignment and formatting options provides viewers with greater comprehension of the data presented.
Learning:
The excel worksheet contains a grid of over 17 billion cells. Applying appropriate formatting to the cells within your spreadsheet will make for a more professional and understandable spreadsheet. Different combinations of alignment options and formatting options can be applied. To apply these formatting options, select a cell or cell range first, then use the menu options on the home ribbon to adjust the format of the cell(s). The format is only applied to the selected cells.
Cell Alignment
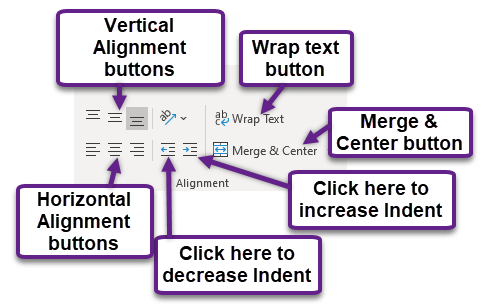
The cells in a worksheet can be aligned multiple ways to display the data they house. The following are the different ways you can align numeric and nonnumeric data within a cell or cell ranges. For example, text and numbers can be centered in a cell location, left justified, right justified, and so on. In some cases, you may want to stack multiword text entries vertically in a cell instead of expanding the width of a column. This is referred to as wrapping text. Multiple cell alignments can be applied to cells at the same time, such as merged, right aligned, middle aligned, and wrapped text.
Merging and Center Align
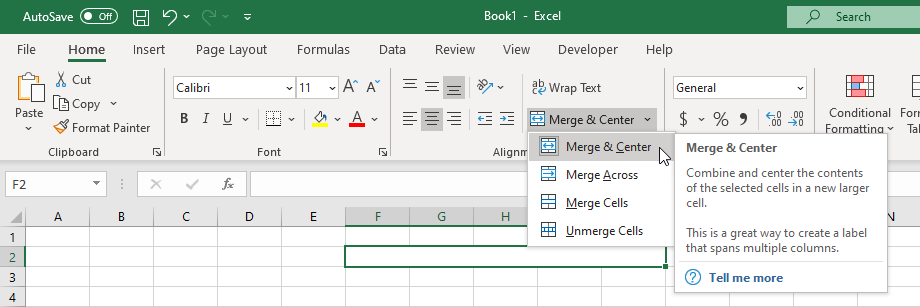
The alignment of data using Merge and Center performs multiple actions at one time. It merges cell selections into a single cell and then centers the data after merging the cell selections. There is a drop-down menu that allows the merging of cells with other alignments (left or right) and unmerging cells. The Merge & Center option is available on the Home tab / Alignment Group.
Wrap Text
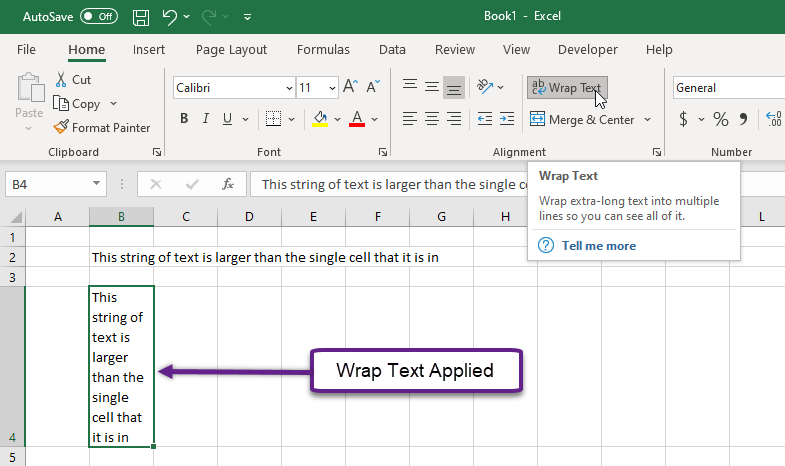
The alignment of data using Wrap Text, wraps the data in a cell that spills out of the right side of a cell into multiple lines within the current cell’s column width. The Wrap Text option is on the Home tab / Alignment group.
Right, Left, and Center Align
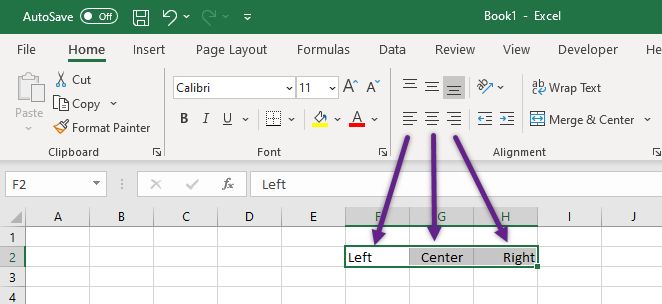
Right alignment, aligns data to the right edge of the cell border and left alignment, aligns data to the left edge of the border. Center alignment will align data in the center of a cell.
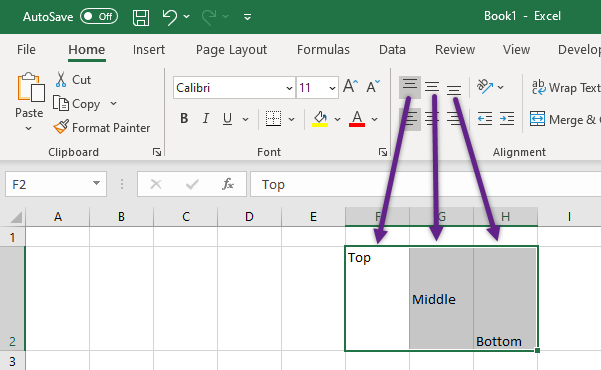
Top, Middle, and Bottom Align
Top alignment, aligns data to the top edge of the cell border and bottom alignment, aligns data to the bottom edge of the border. Middle alignment will align data in the middle of a cell.
Cell Formatting
Enhancing the visual appearance of a worksheet is a critical step in creating a valuable tool for you or your co-workers when making key decisions. In Excel, cells can be formatted to include the shading of cells to include colors, borders to increase readability, styles that apply specific looks to certain data, and the use of built-in filling of information using the AutoFill feature.
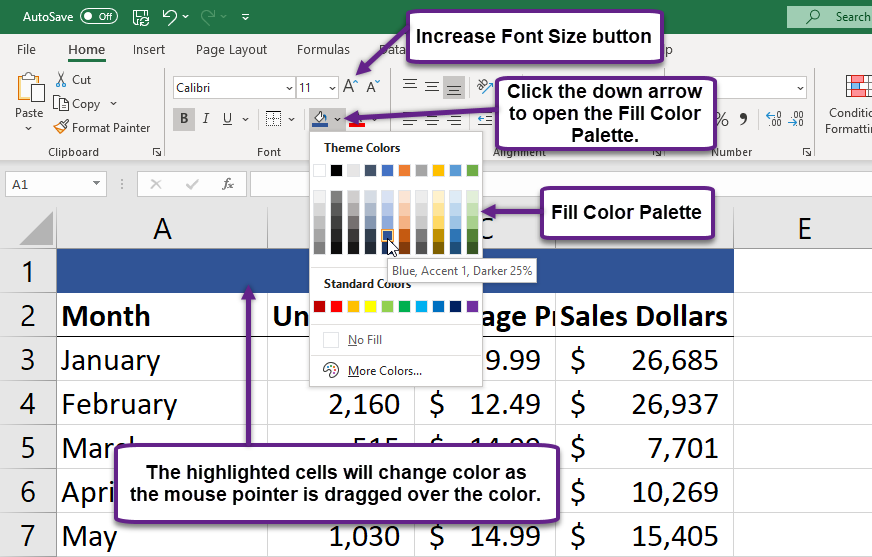
Shading
Excel provides the opportunity to color the background of active cells by choosing a color from the Fill Color button dropdown menu, which displays the color palette.
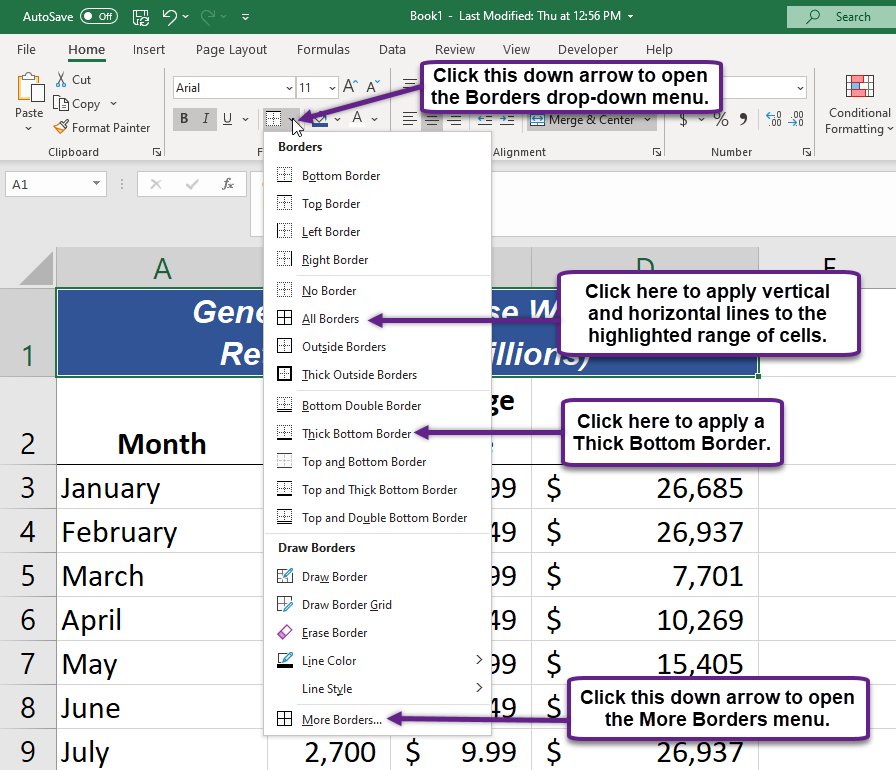
Borders
In Excel, adding custom lines to a worksheet is known as adding borders. Borders are different from the grid lines that appear on a worksheet and that define the perimeter of the cell locations. The Borders command lets you add a variety of line styles to a worksheet that can make reading the worksheet much easier.
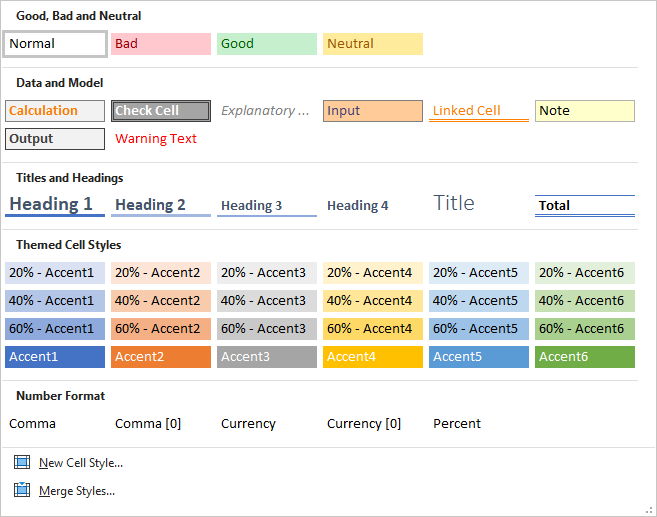
Styles
The Excel styles menu includes many predefined named styles that allow for the presentation of data using a theme that can include borders, shading, and font options. Represented with a live preview, hovering over a cell style will display on the selected cells. Cell styles menu is categorized into multiple sections to address specific data sets.
AutoFill
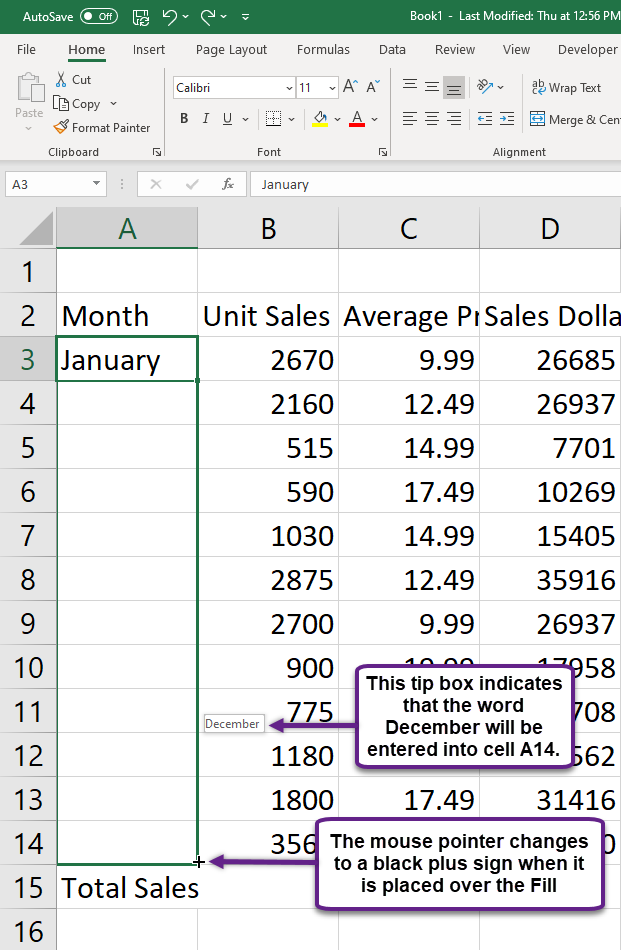
The Excel tool Autofill allows you to fill in data by entering minimal amounts of initial information like January in cell A1 and then use AutoFill to complete the remaining 11 months across the row. Or entering 1 in cell A1 and 2 in cell A2, then highlighting both cells you could number cells below these two cells using the AutoFill feature. The AutoFill handle, a small square in the lower right corner of a cell is the method that this tool is used.
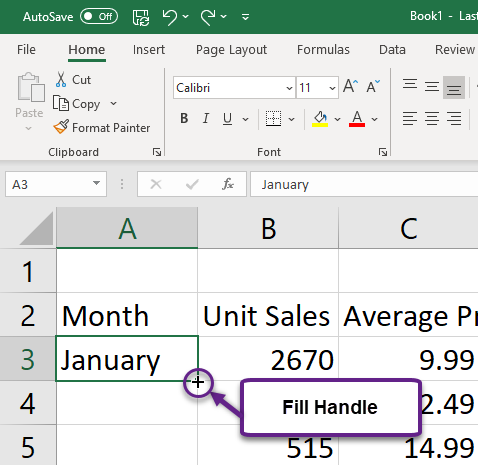
By placing your cursor on the AutoFill handle you can drag it across or down cells to fill in information automatically. A screen tip will appear next to the cell that you are filling indicating what data will be entered into the cell if the AutoFill tool is used.
Summary:
Working with cells and cell ranges in the formatting, alignment, and placement of data makes Excel a powerful tool for working with data as it is highly customizable. Displaying data in cells using a combination of alignment and formatting options provides viewers with greater comprehension of the data presented and moving, deleting, or inserting new data is relatively easy.
Sources:
Brown, N., Lave, B., Romey, J., Schatz, M., & Shingledecker, D. (n.d.). Beginning Excel. Open Oregon Educational Resources. https://openoregon.pressbooks.pub/beginningexcel/