Entering Data
Introduction:
Excel workbooks are used to organize data very clearly. The data that you enter in a cell within the spreadsheet can be numbers, text, dates, times, or mathematical calculations. You can adjust the format of the data to display in a variety of formats.
Learning:
Entering data in your spreadsheet
Each cell can contain 1 of 4 types of data. They are text, numbers, alphanumeric (combination of numbers and letters), or formulas. This topic will concentrate on the first 3 (text, numbers, or alphanumerics.)
Types of data that can be in an Excel cell.
|
Type of data |
Example |
Formatting options |
Tips to consider |
|
Text |
This is an example of text |
|
Text is left aligned by default Text font, size, bold/italics, color, and wrap within a cell can be adjusted Text cannot be used in calculations and will result in an error |
|
Number |
12,345.67 |
|
Numbers are right aligned by default Only numeric data can be used for mathematical calculations
|
|
Special types of numbers Date Time |
Jan 1, 2020 1/1/2020 1/1/20 12:00 pm |
|
Dates and time are stored as numbers, but displayed as date by adjusting format. The date calendar in Excel starts on January 1st, 1900, and each day is represented by a whole number since Jan 1 1900. Therefore Jan 1 1900 = 1 Jan 2 1900 = 2 Jan 1 2020 = 43831 Calculations can be performed on dates. |
|
Alphanumeric |
Project1 |
|
Treated like text, but some advantages of numbers do apply. Excel does recognize the number and will generate an automatic sequence when copying the text: Project1, Project2, Project3, …. |
|
Formulas and functions |
Will be discussed in future activities |
||
Manually entering data
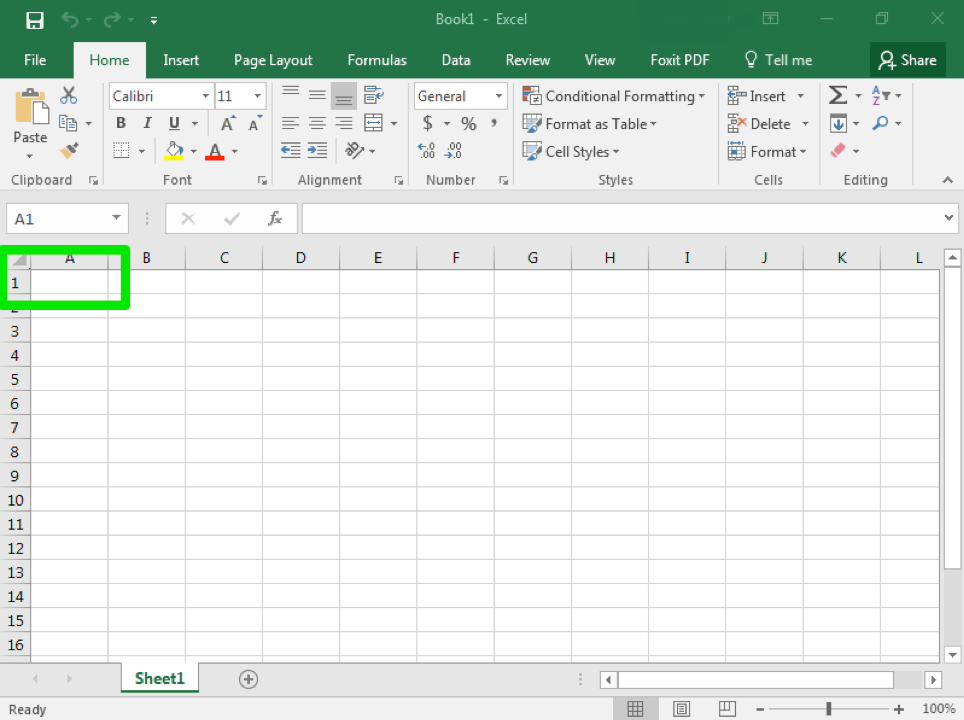
First, open a blank workbook. Next, click on the first cell for your data: this will almost always be A1. Manually type your text, number, or alphanumeric value into the cell
Column Headings and Row Labels
It is critical to include column headings (and row labels as applicable) that accurately describe the data that follows in each column (or row) of a worksheet. In professional environments, you will likely be sharing Excel workbooks with coworkers. Good column headings reduce the chance of someone misinterpreting the data contained in a worksheet, which could lead to costly errors depending on your career.
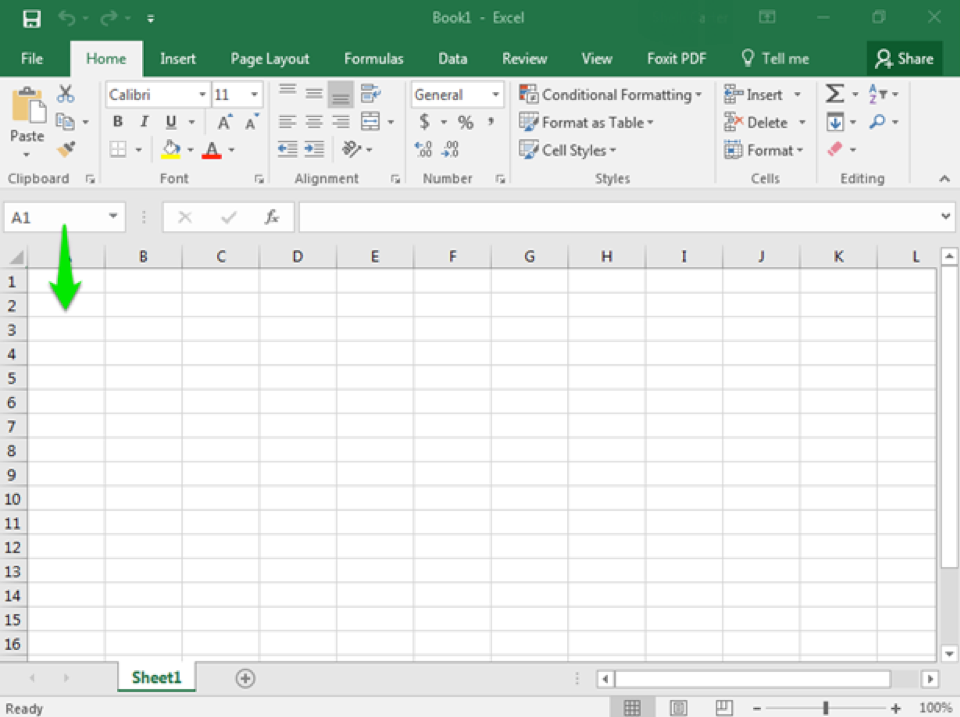
If you wish to organize your data in a column, you will hit ENTER to move to the next cell down. In this case, A2. The ENTER key moves down 1 cell in the same column. To move up, use SHIFT + ENTER.
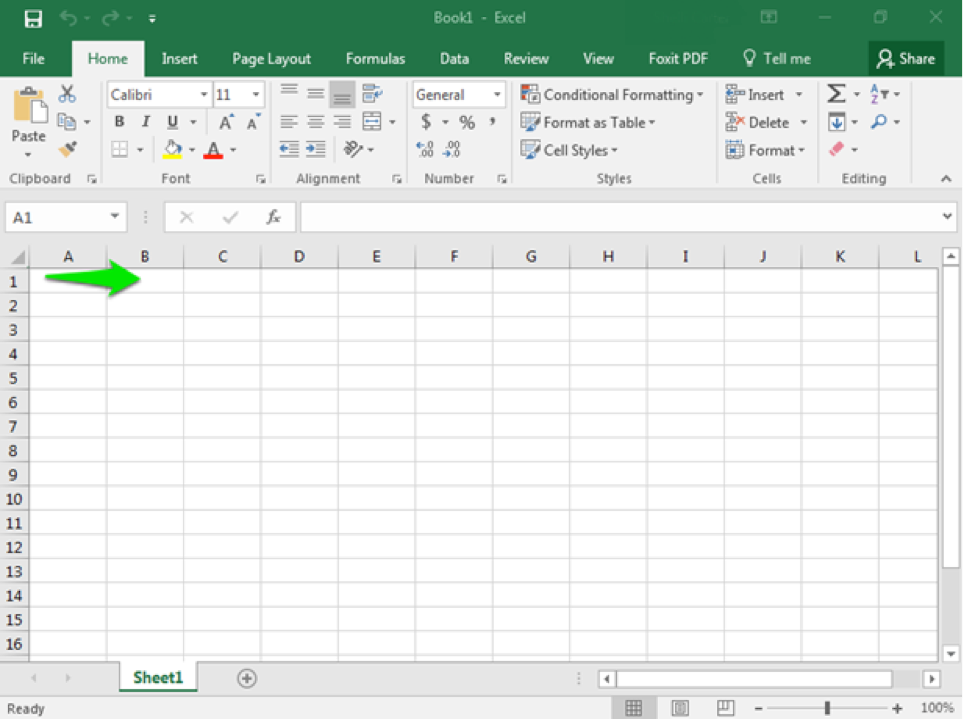
If you wish to organize your data in a row, you will hit the Tab key to move to the next cell over. In this case, the next cell over is B1. The TAB key moves 1 cell to the Right. To move to the Left, use SHIFT + TAB.
Alternatively, you can use the left click on your mouse to select any cell anywhere on the worksheet.
Enter all of your data into each individual cell until you are ready to save your workbook.
Editing Data
You may have noticed that as you were typing data into a cell location, the data you typed appeared in the Formula Bar. There are multiple methods to edit data withing a cell. You can edit a cell by selecting the cell and then clicking in the formula bar or by double-clicking the cell; double-clicking the cell will place your cursor inside that cell, allowing you to edit directly inside the cell.
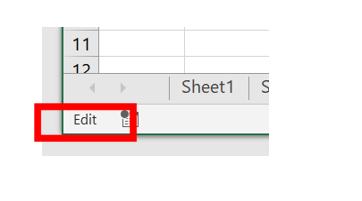
When you are editing the contents of a cell, Excel is operating in Edit mode. When Excel is in Edit mode, the word Edit appears in the status bar (lower-left corner of the Excel program window)
Once you have adjusted the contents of your cell (directly in the cell or in the Formula bar) be sure to ENTER to accept the edit and return Excel to the Ready mode.
Formatting the data
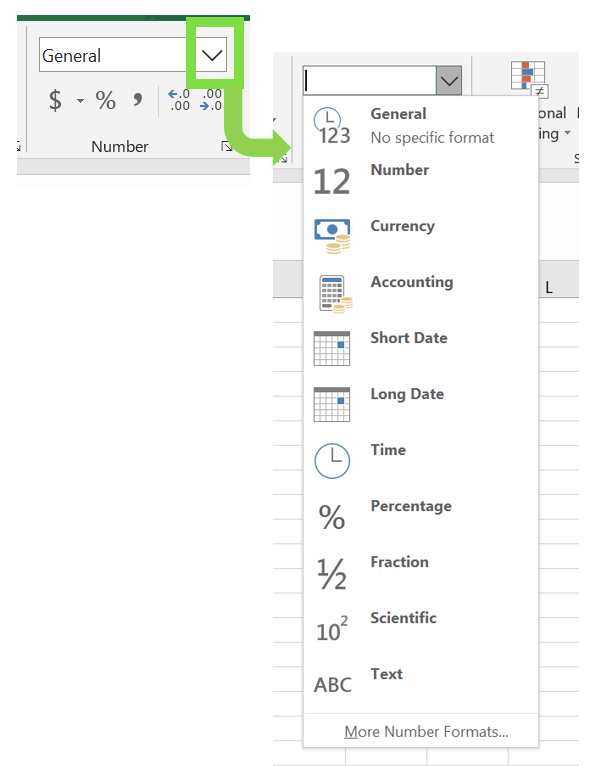
There are many ways to adjust formats for data that is entered within each cell. The content of the selected cell(s) will be stored in Excel as entered, but the display (what is seen by the user) of the cell(s) can be altered with number format options. The formatting options can be found on the Home ribbon. The fastest method is to use the Number group on the ribbon of the Home tab, and expand the selection list from the dropdown arrow.
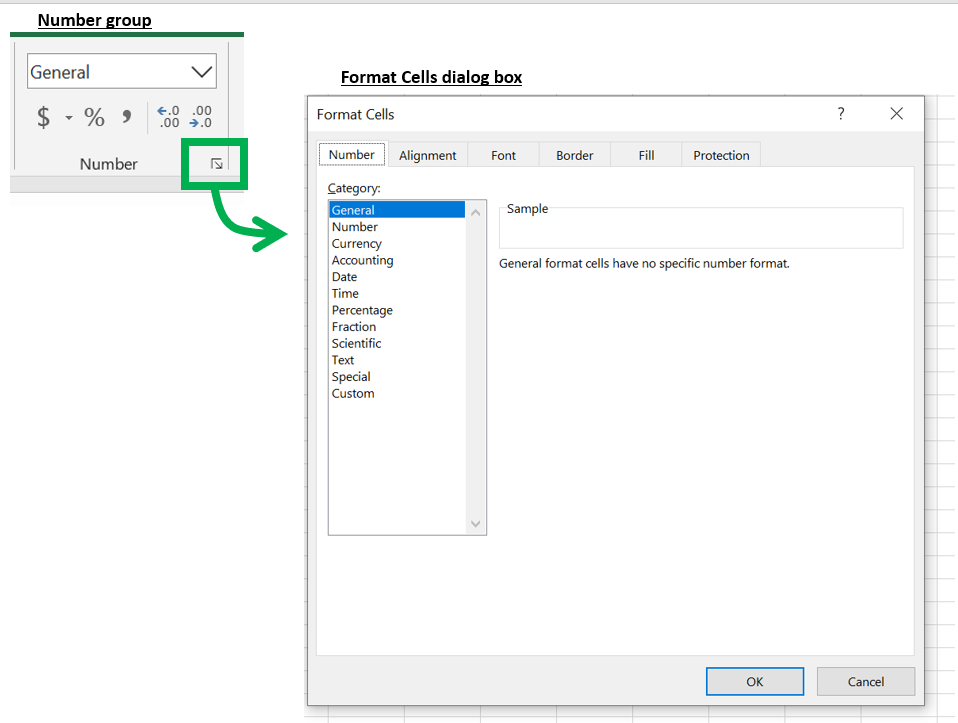
As with most tasks in Excel, there are many methods to access the same menus. An alternative way to define the data format is to click the Dialog Box launcher to Number on the Home tab in the Number group. The advantage of this method is you have ability to change multiple aspects of the cell format from the dialog box in addition to the number format (such as alignment, font, border, and fill.)
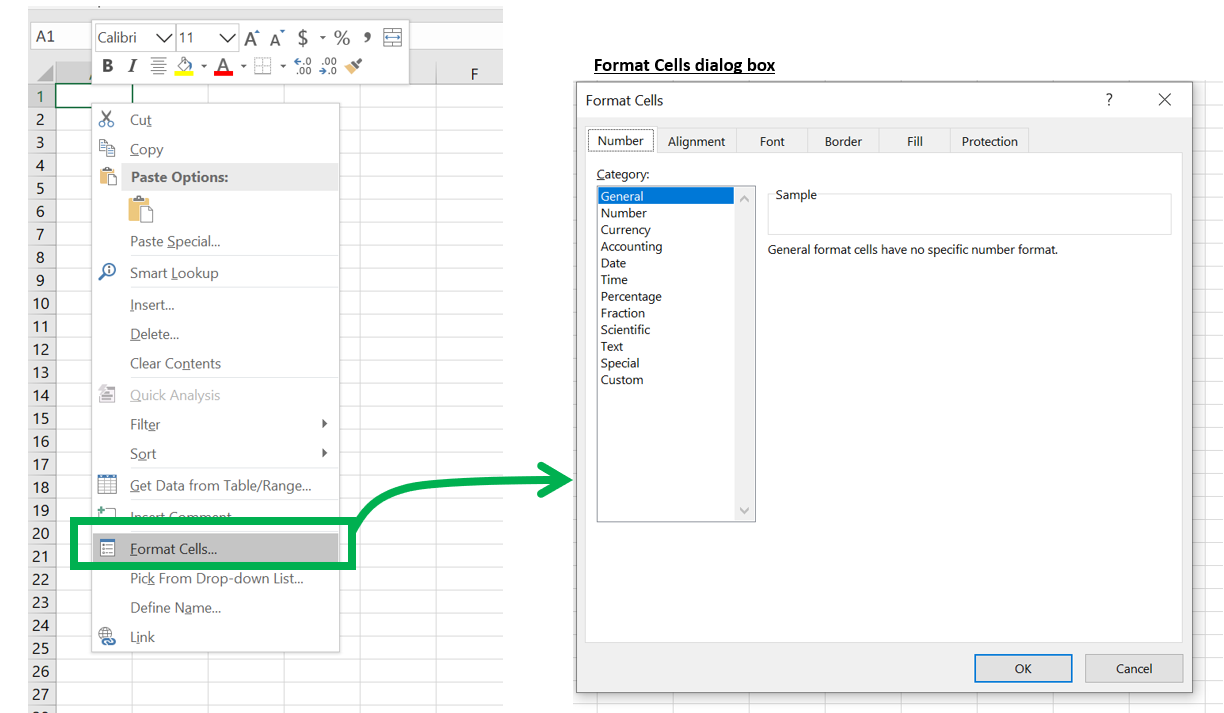
Another method to access the Format Cells dialog box is to select the cell(s) that you wish to adjust the format, right-click with your mouse, and select Format Cells from the available menu. The Format Cells option will launch the Format Cells dialog box.
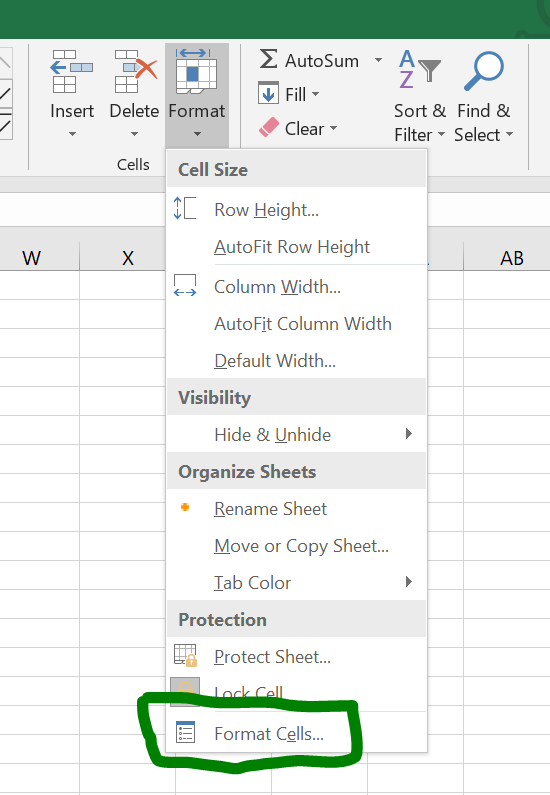
The final method to adjust the number format of a cell’s content is from the Cells Group on the ribbon of the Home tab. The menu item to select is the Format menu. From this menu, many formatting options can be adjusted including the Format Cells menu.
Summary:
The data that you enter in a cell within the spreadsheet can be numbers, text, dates and times, or mathematical. Column headings and row labels should be used in a worksheet and should accurately describe the data contained in each column or row. Adjusting the format of the data can be managed by accessing various commands on the Home ribbon or by using the menu launched with right-click of the mouse.
Sources:
Enter Data into a Table. Authored by: Shelli Carter. Provided by: Lumen Learning. License: CC BY 4.0
Introduction to Basic Formatting and Layout. Authored by: Shelli Carter. Provided by: Lumen Learning. License: CC BY 4.0