Inserting and Deleting Column and Rows
Introduction:
As we learned previously columns and rows contain the data found in worksheets. Their sizes can be adjusted manually or by using the built-in AutoFit command. To delete or add columns and rows in a worksheet allows for the adaptation of data to include or remove columns and rows. Columns and rows can be cut, copied, and pasted within a worksheet, workbook, or across workbooks. Moving columns and rows is done through the cut and paste actions. It is important to remember that deleting a column or row affects all the data in a column or row.
Learning:
Inserting and Deleting Columns and Rows
The insertion or deletion of columns and rows in worksheets can be done in two ways. The first involves selecting a column or row header and using the Insert button in the Cells group of the Home tab on the Ribbon.

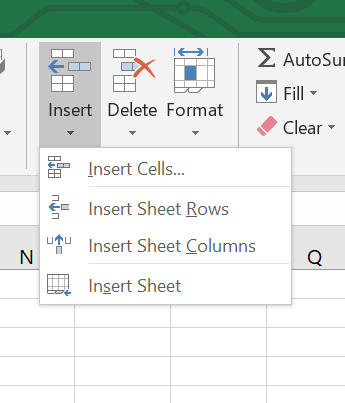
To insert a column in the worksheet, select an entire column, then select Insert Sheet Column from the drop-down menu. Similarly, to insert a row you would select an entire row, then the Insert Sheet Row option from the drop-down menu. If you have multiple columns selected, for example two columns B & C, and the Insert is used, two new columns will be inserted. Likewise, if multiple rows are desired, then select the number of rows, insert sheet row, and the new rows will be added.
Inserting a column will shift all the columns to the right to make space for the new column
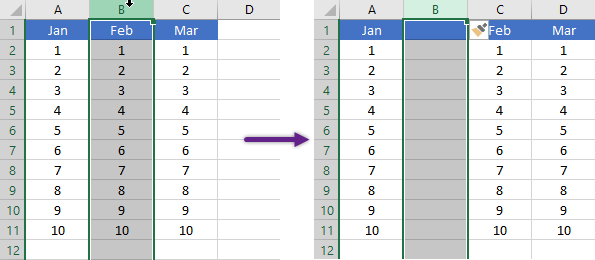
and inserting a row will shift all the row down to make space for the new row.
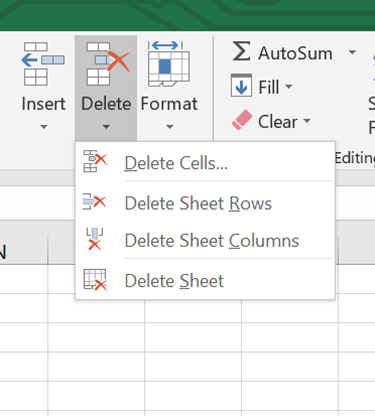
The Delete menu is similar to the Insert menu. Deleting a column or row is done using the same Cells group on the Home tab, but you would use the drop-down menu found on the Delete button and choosing to Delete Sheet Row or Delete Sheet Column. Be forewarned, when deleting columns or rows, there is no warning given when the delete option is used. If for some reason you unintentionally delete, you can use the Undo command.
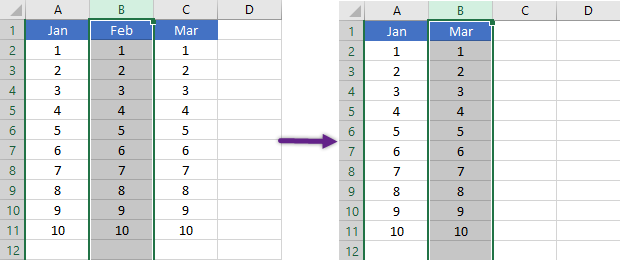
Example of Delete Columns
Start by selecting the column header, in this case Column B. Select Delete Sheet Column from the Delete menu dropdown. The original column B is deleted and all remaining columns shift to the Left
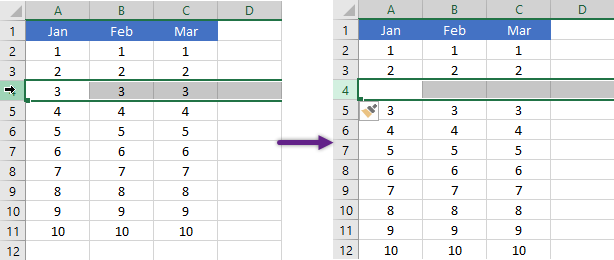
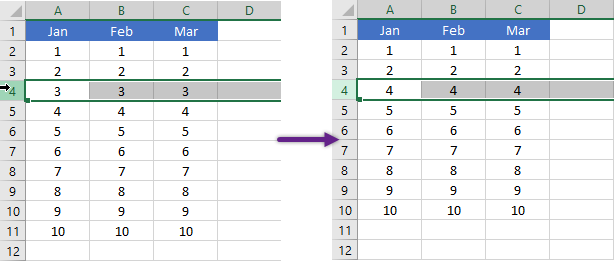
Example of Delete Rows
Start by selecting the row label, in this case row 4. Select Delete Sheet Row from the Delete menu dropdown. The original row 4 is deleted and all remaining rows shift up.
The second method of inserting or deleting a column or row is to use the right-click menu available when you right click a column or row header. From the right-click menu you would select delete for either a row or column that is selected. Deleting a column will simultaneously delete the selected column(s) and shift all the columns to the left, whereas deleting a row(s) will shift all the rows up to fill the space left by the deleted row.

Each of these two methods can delete or insert one or more columns or rows that are selected.
Moving Columns and Rows
Moving columns and rows can be done using cutting and pasting which is detailed below. Columns and rows that have been cut can be inserted into an existing list of data through the Insert button in the Cells group on the Home tab or by using the right-click menu. When inserting cut columns that contain data select the column heading to the right of where you want the inserted column to display or the row below where you want to row to be inserted.
Cutting, Copying, and Pasting Columns and Rows
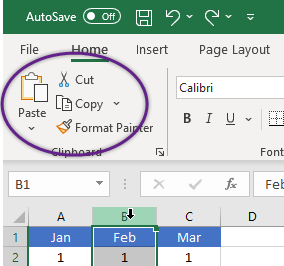
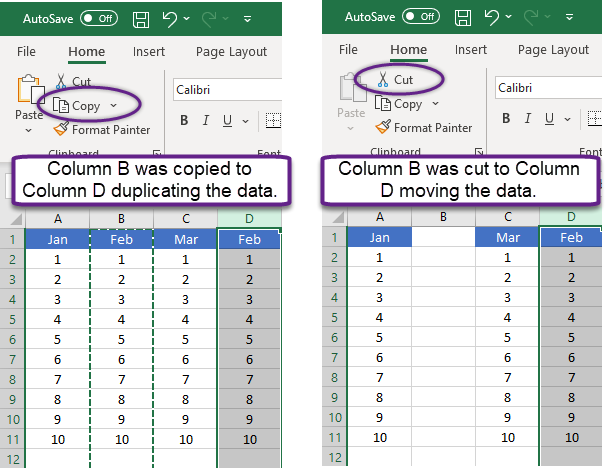
Cutting, copying, and Pasting columns and rows provides an easy way to duplicate or move columns and rows of data in a worksheet, workbook, or across workbooks. Copying a column or row allows you to place a duplicate set of information into a different location. Cutting a column or row allows the removal of data from its current position and repositioning it elsewhere. You can find the Cut, Copy, and Paste options on the Home tab ribbon, Clipboard group.
Cut or copied columns and rows are displayed using the paste function. In either case, cutting or copying, the insertion of the column and row abides by the standards set above about choosing the column header to the right of where you want the cut or copied column to display or choosing the row header below the row where you want the copied or cut row to display.
NOTE: If you want the cut or copied column or row to occupy a space between existing columns and rows use the insert command instead of pasting the information.
Summary:
Inserting, deleting, and moving columns and rows provides you with excellent flexibility in displaying your data and expanding or shrinking it when needed. Learning these skills will help you to define and reimagine data that you are working with and give you tools to make worksheets work for you not against you. The process to insert columns or rows is:
- Activate the cell to the right of the desired blank column or below the desired blank row.
- Click the Home tab of the Ribbon.
- Click the down arrow on the Insert button in the Cells group.
- Click either the Insert Sheet Columns or Insert Sheet Rows option.
Sources:
IDM