Insert / Delete / Group Worksheets
Introduction:
Worksheets contained in a workbook are shown at the bottom of the workbook and represented by named tabs. We have previously learned how to rename those tabs and now we are going to explore how to insert, delete, group, ungroup worksheets and how to color worksheet tabs and freeze panes in a worksheet.
Learning:
Inserting and Deleting Worksheets
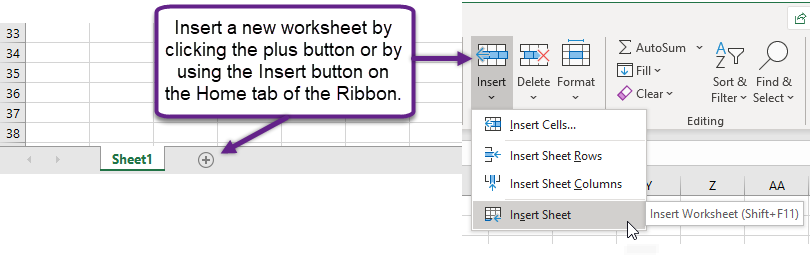
Workbooks can contain multiple worksheets and inserting or adding them is simple and easy. To add a worksheet, click on the New Sheet button (plus button next to the worksheet tab) or you can add a new worksheet using the Insert button on the Home tab in the Cells group.
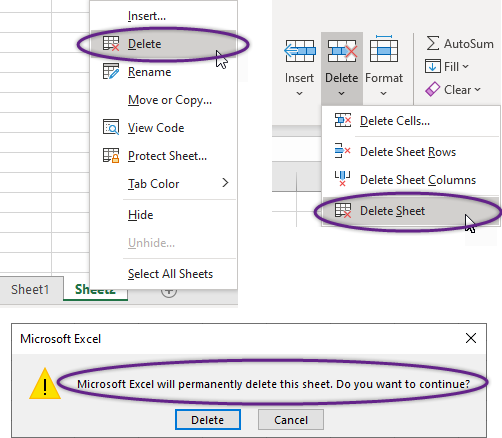
Deleting worksheets cannot be undone. Once a worksheet has been deleted the information it contained is gone permanently, you cannot undo this action. Excel will notify you of this before a worksheet is deleted that contains data. To delete a worksheet, activate the sheet you wish to delete. You can right click on the worksheet tab and choose to delete. Alternatively, you can use the Delete button on the Home tab of the ribbon in the Cells group. Expand the Delete button dropdown and choose “Delete Sheet”
Coloring Worksheet Tabs
The worksheet tabs at the bottom of the workbook can be colored to provide an easier way to identify data when looking for specific data sets across multiple worksheets. You can change the worksheet tab color using the Format button on the Home tab or by using the right-click menu.
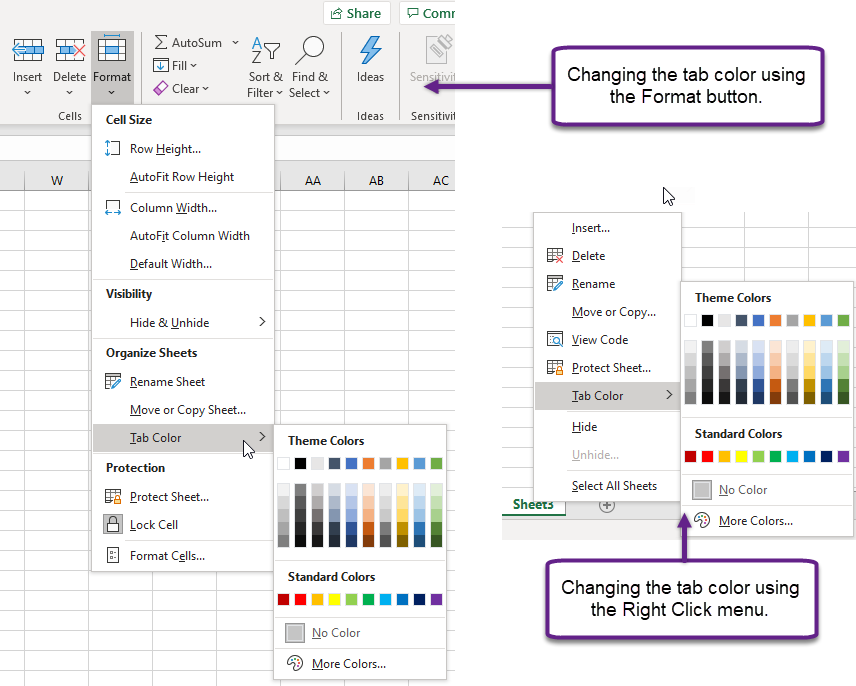
Keep in mind that colors will only show when a worksheet is not selected, and Excel will automatically recolor the text to white if you choose a dark color. The green worksheet (Sheet2) is active.

Grouping and Ungrouping Worksheets
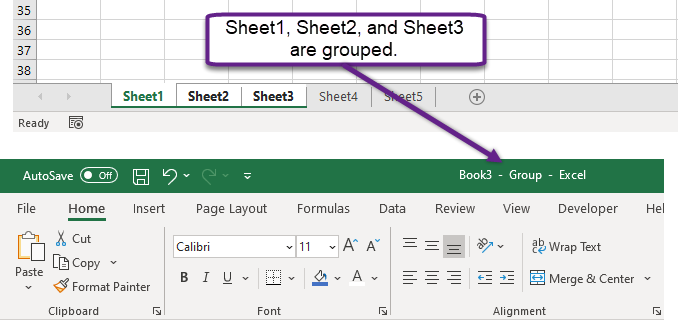
Excel allows for the grouping of worksheets to speed up the formatting and execution of tasks to multiple worksheets at one time. It is important that the worksheets that are grouped have the same layout for it to work properly. To group worksheets, select the first worksheet (tab) and then either select adjacent tabs while holding down the Shift key, or you can select nonadjacent worksheets by selecting them using the Control key.
Once the worksheets are grouped, they will display as a highlighted set of worksheets on the tabs and the Title Bar will show a Group indicator notifying you that these worksheets are being edited as a group.
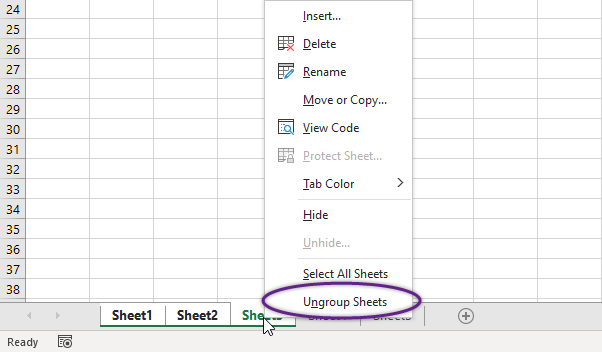
To ungroup worksheets, you can either click on a non-grouped worksheet or you can right click and choose Ungroup Sheets from the menu (bottom option).
Freezing Panes
Excel allows the user to freeze columns and rows within a worksheet to keep important data always visible, making it easier to navigate and identify information without unnecessary scrolling. To freeze a column, row, or both you use the Freeze Panes tool on the View tab of the Ribbon.
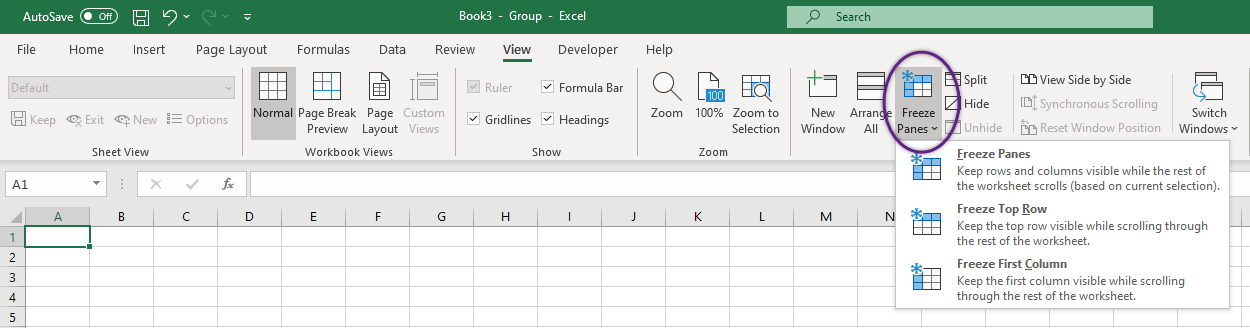
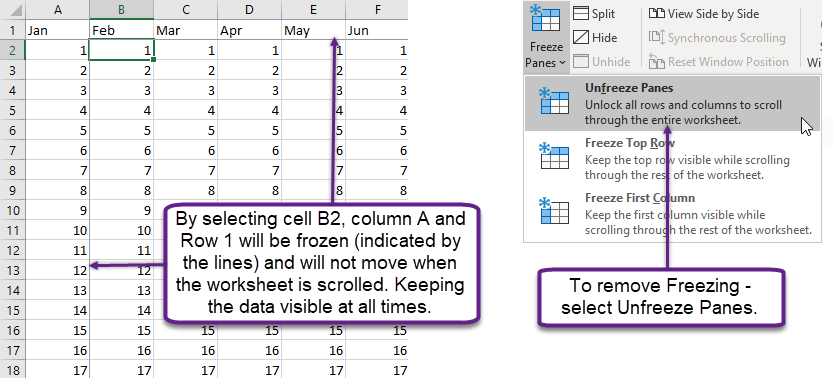
To freeze columns and rows, you choose the cell to the right of the column that you want to freeze and below the row you want to freeze. There are a few pre-existing options in the Freeze Panes menu to make things easier. To unfreeze rows or columns simply repeat the process for freezing them and it will give you the option to Unfreeze instead of Freeze.
Summary:
Worksheets can be added, deleted, moved, copied, colored, grouped, and ungrouped. These actions allow flexibility in working with data across multiple worksheets and workbooks. Using colors allows for easier identification of worksheets and formatting worksheets while grouped provides a faster way to work with similarly designed data. Moving worksheets within a workbook or to an existing or new workbook is easy and gives you the ability to customize workbooks. Likewise, freezing rows or columns in a worksheet allows the user better control of what data remains visible when working with large sets of data.
Sources:
IDM