Sort and Filter
Introduction:
After data has been entered into an Excel worksheet, and even after it has been organized into a table, it can still be manipulated and reorganized. One of the easiest options is to sort the data in a particular order. For example, you can sort the data alphabetically.
Learning:
After data has been entered into an Excel worksheet, and even after it has been organized into a table, it can still be manipulated and reorganized. One of the easiest options is to sort the data in a particular order. For example, you can sort the data alphabetically. The Sort options are available on the Home tab on the far right Editing group or can be found
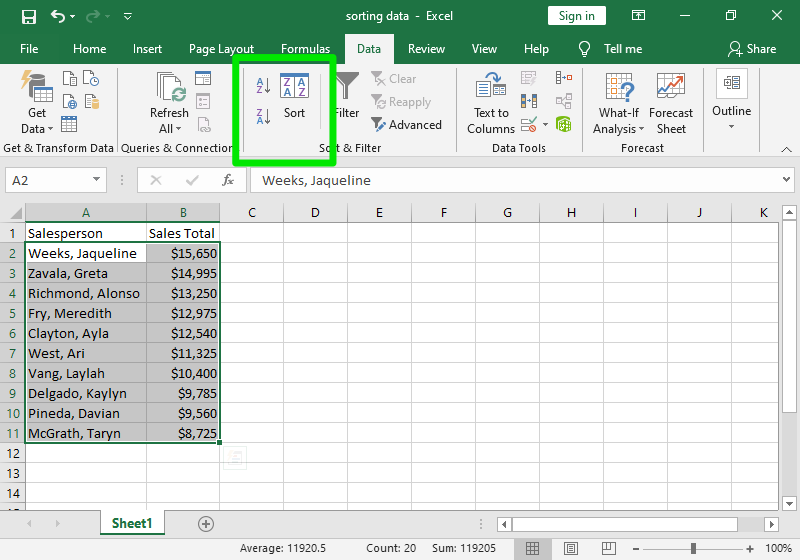
Sort options on the Editing Group on the Home tab
- Select (by clicking and dragging) the data you wish to sort.
- From the Sort & Filter button in the Editing group in the ribbon, click the Sort button.
- From the dropdown menu, choose how you would like to sort the data. For example, A to Z or Z to A. Note that A to Z is equivalent to Smallest to Largest and Z to A is equivalent to Largest to Smallest.

The first 2 options on the Sort dropdown (Sort A to Z or Sort Z to A) will sort the first column of the selection. If you need to sort by a different column within the selection, you’ll need to use the custom sort option, which will be covered separately below.
Sort commands on the Data tab – Sort and Filter group
- Select (by clicking and dragging) the data you wish to sort.
- From the Data tab in the ribbon, click the appropriate Sort button. For example A to Z or Z to A.
The Custom Sort
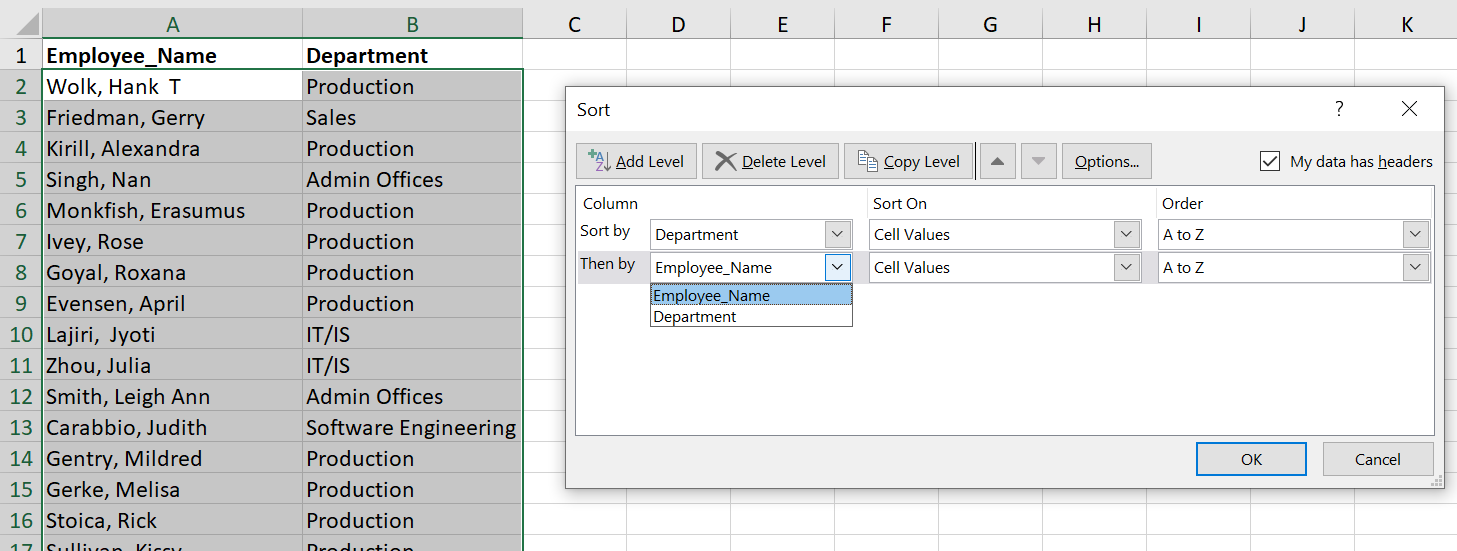
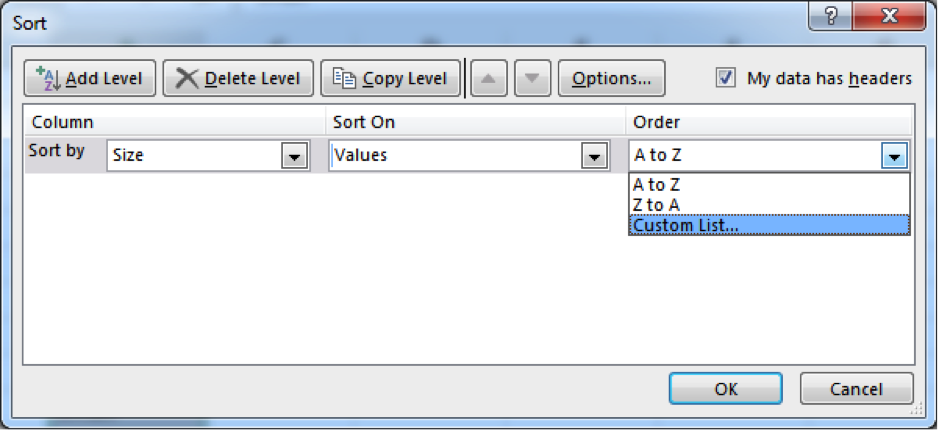
The Custom Sort option allows you to control the options for the sorting process. For example, if you had a spreadsheet that had multiple columns of data, and you want to sort your entire set of data by a column within the selection, you would use the Custom Sort option. You can also sort multiple columns simultaneously using the Custom Sort. For example, if you have a Department column and an Employee column, you can first sort by Department (to group all the employees in the same department together), and then sort by name (to put the names in alphabetical order within each department). Finally, the custom sort option allows the creation of custom lists for sorting. A good example where a custom list is necessary would be for days of the week. If you try to sort days of the week by using the simple A to Z sort option, the result will not be the natural sort of Sun, Mon, Tue, Wed, Thu, Fri, Sat. It would sort alphabetically as Fri, Mon, Sat, Sun, Thu, Tue, Wed. Days of the week are a common sort type, and are already included in the custom lists. It is possible to create a custom list specific to your requirements. For example, perhaps you wish to sort a list by sizes – small, medium, large. Xlarge. You can create your own custom list for your own sort order.
- Select (by clicking and dragging) the data you wish to sort.
- If you are using the Home Tab ribbon menu, select Custom Sort from the Sort dropdown. If using the Data tab, click the Sort command.
- The Sort window will appear, allowing you to specify which column you will sort and how.
Multi-level sort – example: Department (to group all the employees in the same department together), and then sort by name (to put the names in alphabetical order within each department)) use the Add Level
Custom List sort
- From the Sort Order box on the far right, use the dropdown list to get the Custom List option
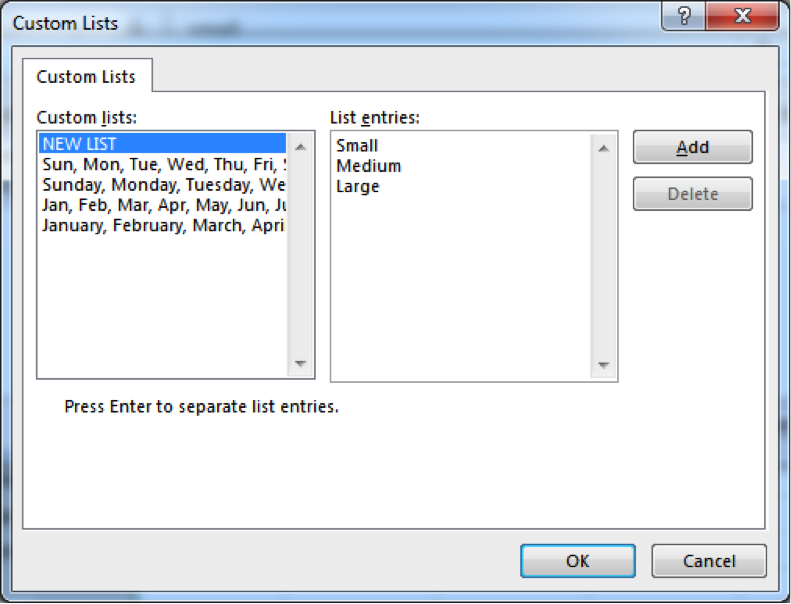
- The Custom Lists dialog box will open. There are several default options in the custom lists (days of the week or months) or you can enter a new list.
- To create a new list, select NEW LIST.
- Type in order the way you would like the data sorted. In this example, we are sorting by size from small to large.
- Click Add and your custom ordering list will appear in the original Order dropdown menu.
- Select your custom list and then click OK.
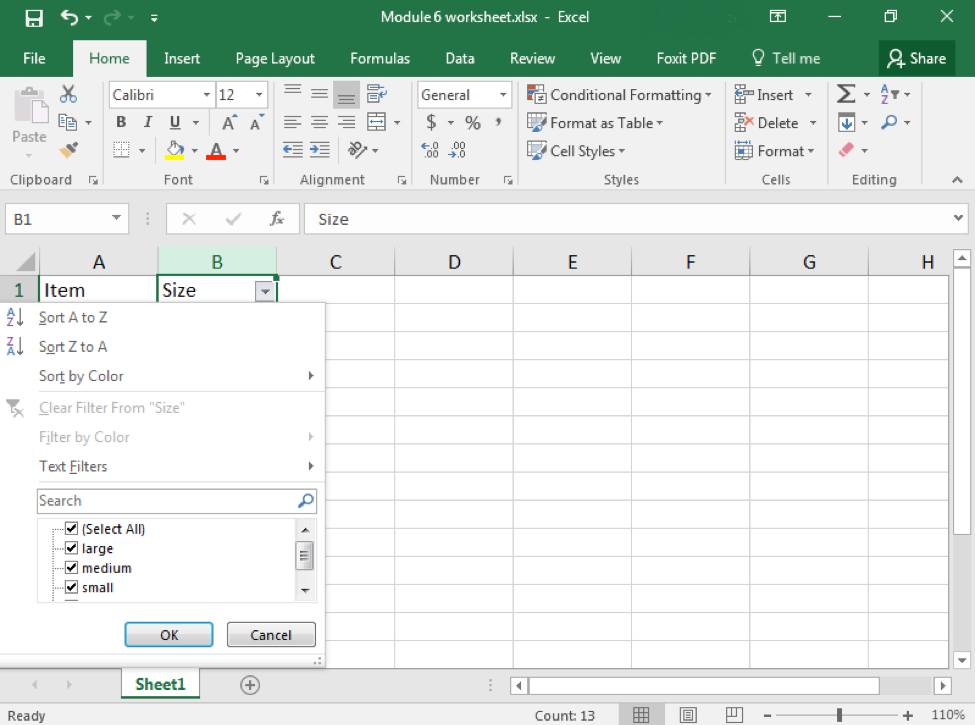
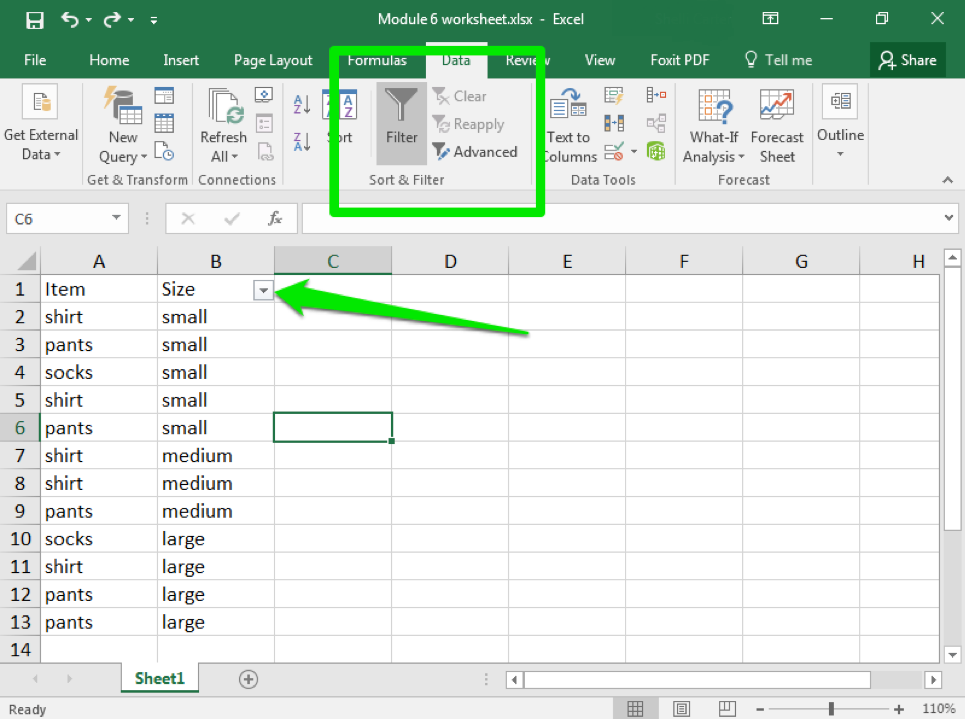
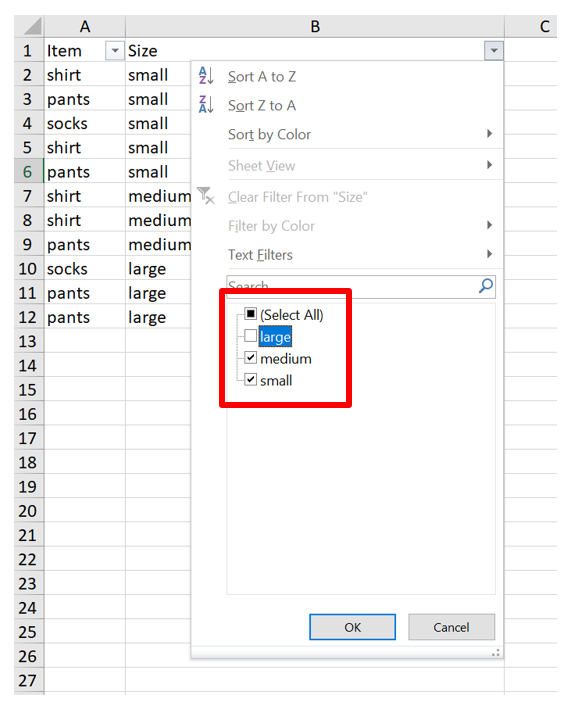
Filtering Data
After entering data in Excel, it is also possible to filter, or hide some parts of the data, based on user-indicated categories. When using the Filter option, no data is lost; it is just hidden from view.
Method 1
- Select the column or row you wish to sort.
- From the Sort & Filter button in the Editing group in the ribbon, click the Filter button.
- When the Filter menu appears, you can choose which categories of data to hide and deselect the appropriate buttons. For example, you can deselect the button next to large and you will no longer see the large cells in your table.
Method 2
You can similarly access the Filter menu through the Data tab; the same menu will appear.
For this example, and you want to filter the list to only show small and medium, use the filter dropdown in the cell label. In this case, in cell B1. The option box will open and you can uncheck the size large from the list. The rows with “large” with be hidden (NOTE: They are not removed, just hidden)
Summary:
There are many options available for sorting and filtering data table on a spreadsheet. Sorting is used to shuffle the order of rows based on the sort options selected. Filtering is a great option to leave the data in original form, but hide rows that do not meet the selected filter riteria.
Sources:
Sort Data. Authored by: Shelli Carter. Provided by: Lumen Learning. License: CC BY 4.0
Filter Data. Authored by: Shelli Carter. Provided by: Lumen Learning. License: CC BY 4.0