Screencast-O-Matic Tutorial
Contents:
Downloading Screencast-O-Matic
Submitting Your Video to Discussions in Canvas
Submitting Your Video to Assignments in Canvas
Screencast-O-Matic
Screencast-O-Matic provides a free and easy way for you to make recordings for assignments and discussions in your classes.
Note: There is a 15-minute recording limit for the free version, which should be plenty for most assignments.
Downloading Screencast-O-Matic
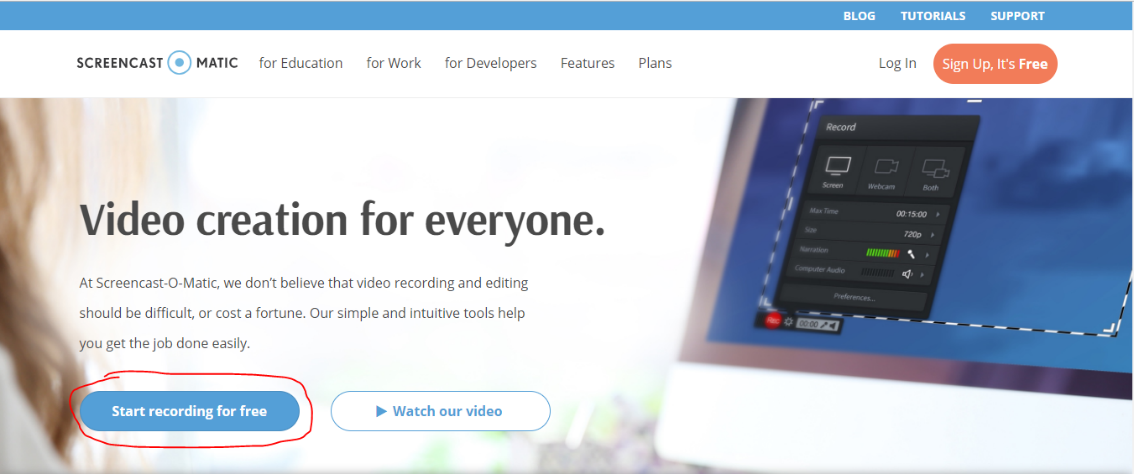
- Go to Screencast-O-Matic.com
- Click the “Start recording for free” button in the lower left.
- On the next page, click “Launch Free Recorder.”
Note: This will start a download of the WebLaunchRecorder.exe file. Choose where you would like to save the file and launch the .exe file. The first time you use the program, this will trigger download and installation before launching the recorder
Preparing to Record
- When the program launches, you will be presented with a control panel with a number of options:
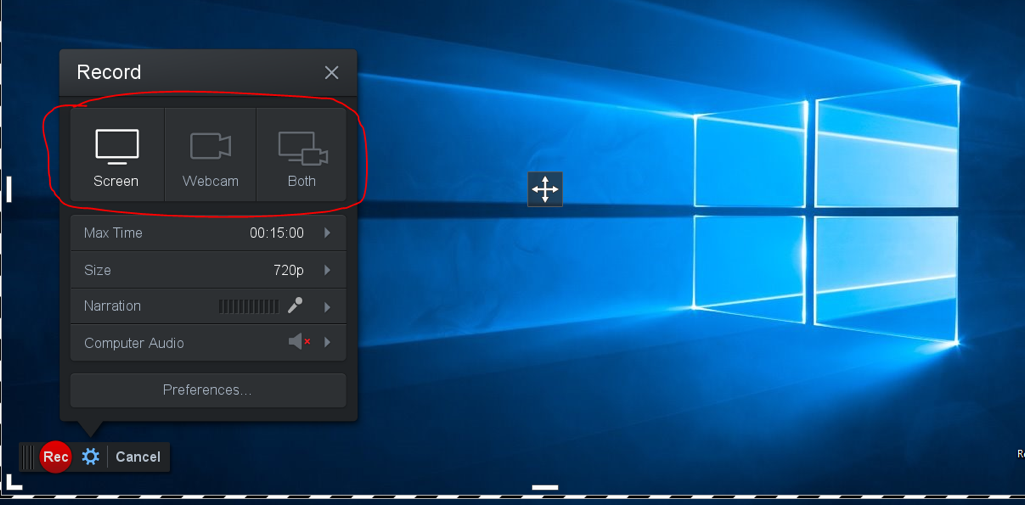
- The first set of options allows you to decide what source you will be recording from. The default is to record what is seen on your screen, but you can also record with your webcam, or both, where you can see both your screen and a smaller frame of yourself simultaneously.
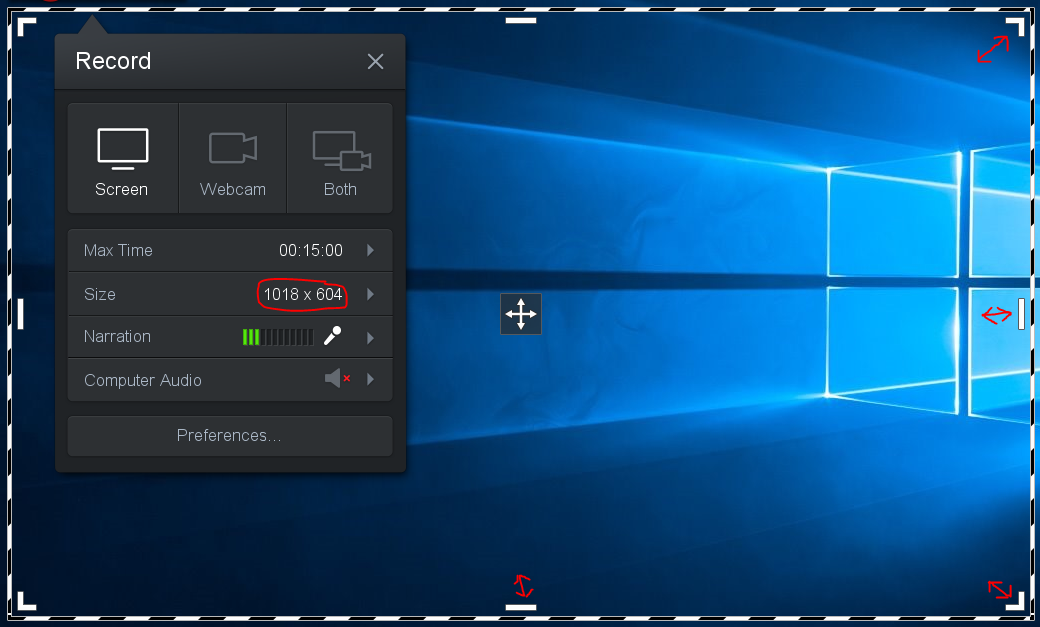
- The “Size” menu gives you several options for deciding how much of your screen will be visible in the recording. By choosing either 720p or 480p, you will be able to crop a specific segment of your screen to be recorded by clicking and dragging to resize the recording border.
- Choosing either Fullscreen or Active Window from the Size menu will record everything on your computer screen.
Note: As you resize, the “Size” field will automatically change to reflect the current dimensions of the current recording area
Sound Settings
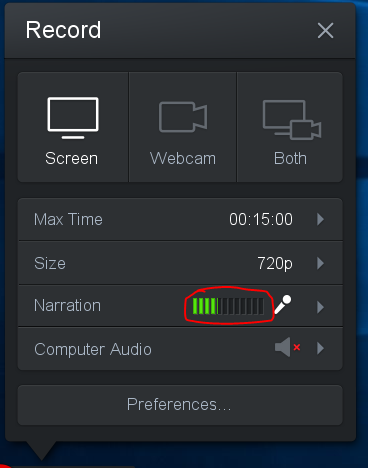
- The Narration menu will allow you to choose which microphone you will be using to record your voice-over audio.
- The green signal bars will indicate if the currently active microphone is receiving a signal.
- If you are speaking and there is no change in the signal level, there is likely an issue with the active microphone, and you should make sure that you are using an enabled microphone by clicking “Narration” and determining which microphone is selected.
- When you have checked that the settings are appropriate for your purposes, you are ready to begin recording
Recording
- To start recording, press the red REC button. The program will present a countdown from three before the recording starts.
- When you have finished recording, press the blue pause button.
- If you wish to pick up recording from where you left off, you may press record again after pressing pause, and the program will add on to the existing recorded segment.
- You may start over at any point by pressing pause and then clicking the trash bin icon. This will delete the entire video.
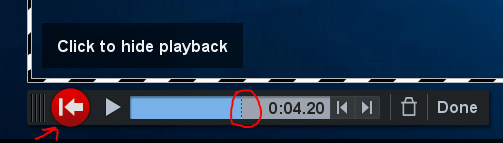
- If you make a mistake or would like to re-record starting at a certain point in what you have recorded, you can click on the playback bar to select the time at which you would like to start re-recording and click the truncate button. This will cut off the original recording at the point you selected but leave any recorded material before that point intact.
Exporting Your Video
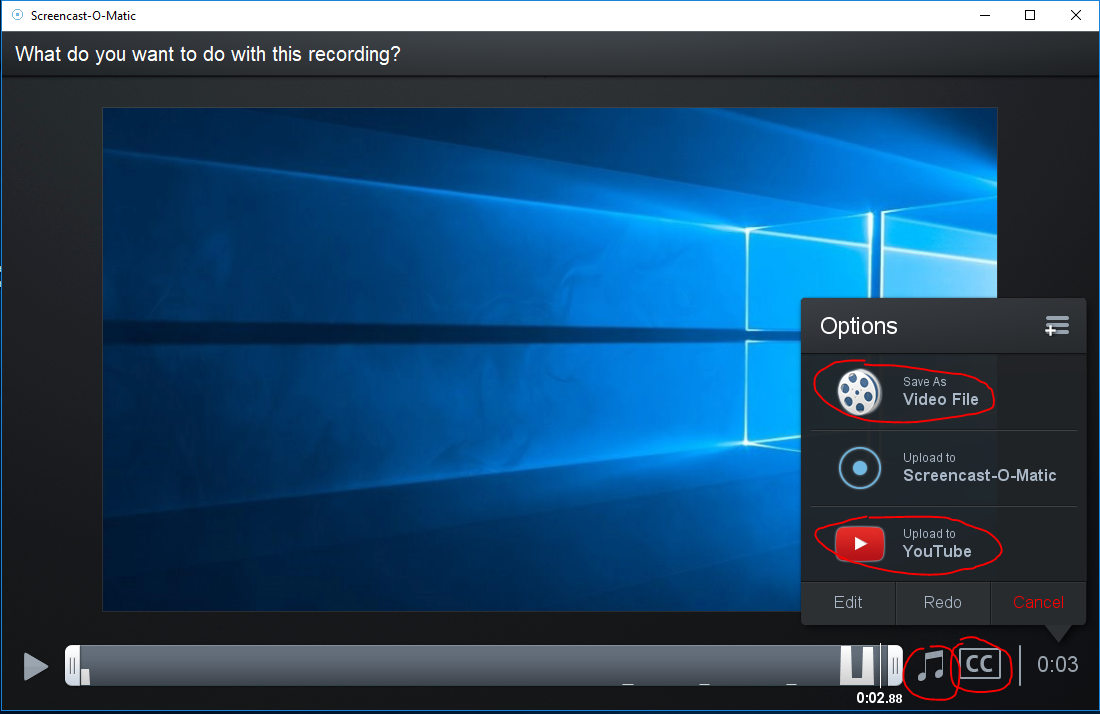
- When you are satisfied with what you have recorded and would like to export the video file, click “Done” after you pause the recording. This will bring up a window where you can view the video.
- With the free version, you are able to then add stock music or captions to your video.
- When you are ready, you may export the video file to your desired location on your computer, or upload it directly to YouTube.
Uploading Directly to YouTube
- From the Screencast-O-Matic upload options, choose “Upload to YouTube”
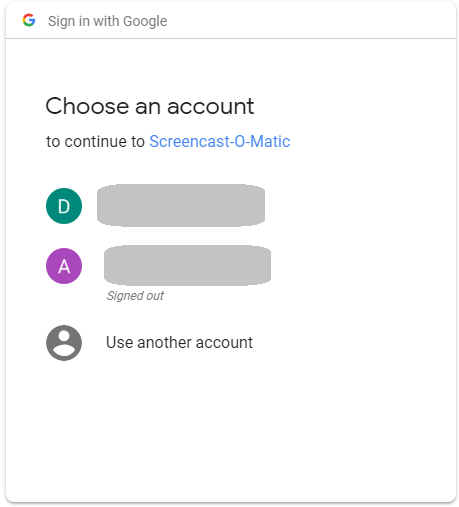
- You will be prompted to choose or log in to an account to link with Screencast-O-Matic. For best results, choose your Bay Path University account.
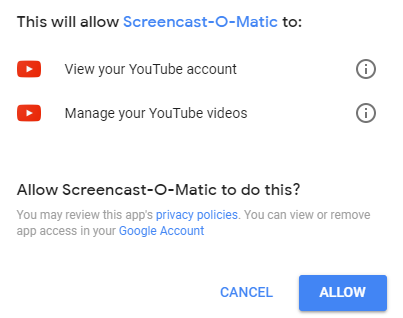
- After choosing an account, Screencast-O-Matic will ask for permission to view your YouTube account and manage your videos. Click “Allow.”
- Screencast-O-Matic will then present you with a few final options for your video.
- Be sure to rename your video by clicking the “Title” field and typing in a new title. Ex: Psychology 101 Assignment – [Your Name]. Note that this is the title that will be visible to your instructor and/or fellow students when you submit it in Canvas.
- From this menu, you may also choose privacy settings. In order for your video to be viewable in Canvas, you must choose either “Public” or “Unlisted.”
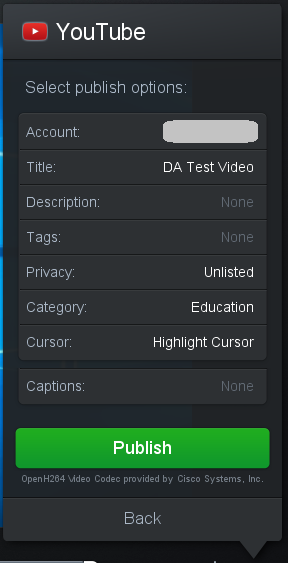
Note: “Highlight Cursor” will be enabled by default. This will place a yellow circle around your cursor whenever it is present in your video. If you do not want this for your video, be sure to disable this setting by clicking the “Highlight Cursor” field and changing the setting accordingly.
- When you are satisfied with your video settings, click “Publish.”
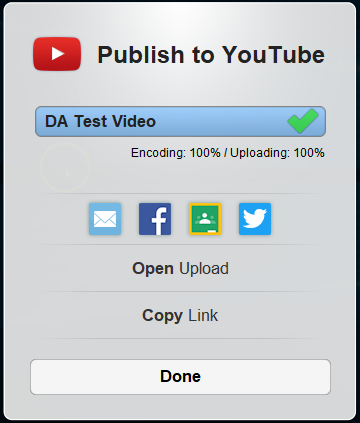
- A new window will appear displaying the status of your upload. When the upload is complete, you will be able to visit the webpage for your new video directly or copy the link.
- When you are finished, click “Done.”
Submitting Your Video to Discussions in Canvas
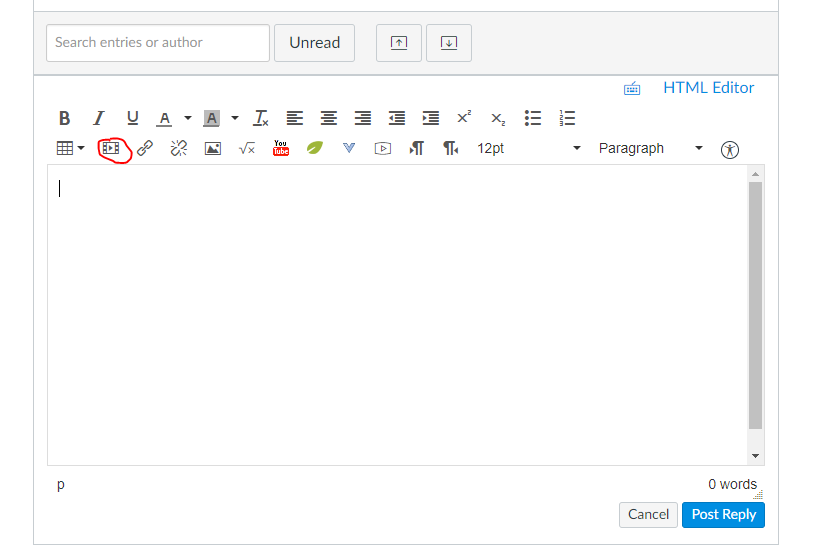
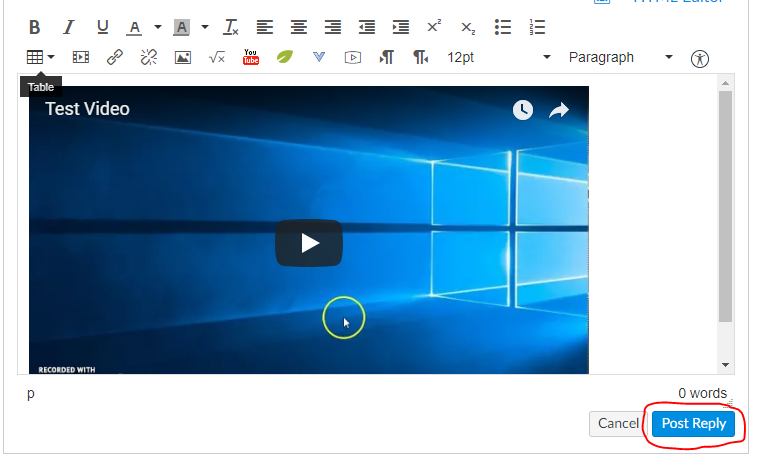
- If you are submitting a video for a discussion, the simplest way is to click the “Insert/Edit Media” button in the discussion reply menu and enter the URL for your video into the “Source” field.
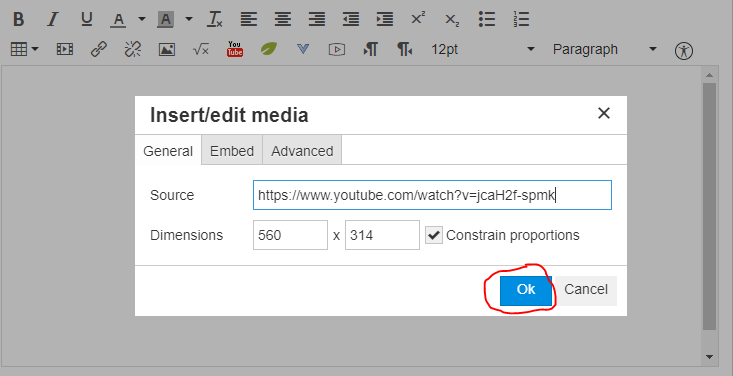
- The “Dimensions” should auto-populate, and you should not have to make any adjustments. Click “Ok.”
- You will then be able to submit your reply with your video embedded.
Submitting Your Video to Assignments in Canvas
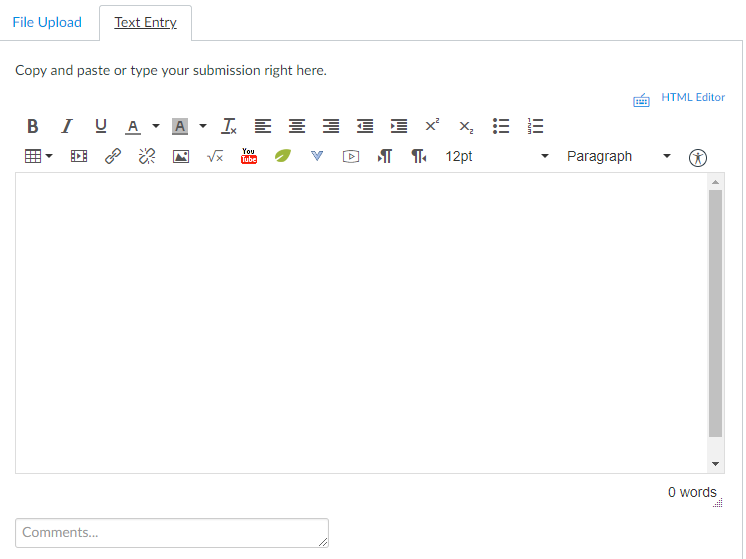
- For assignments with a video submission option, you can copy and paste the URL of your video into a text entry submission.
- In this case, you would simply click “Submit Assignment” and click over to the “Text Entry” tab.
- Enter the link to your video and click “Submit Assignment.”
Congratulations! You now have all you need to create your own videos to submit for your assignments and discussions using Screencast-O-Matic.
You and Screencast-O-Matic, from now on: