Chapter 4
Section 4.4 – Preparing to Print
Learning Objectives
- Review each worksheet in a workbook in Print Preview.
- Locate and fix formatting consistency errors.
- Apply new formatting techniques.
- Use Print Titles to repeat rows and columns on each page of a multiple page worksheet.
- Control where page breaks occur in a multiple page worksheet.
Download and open FILE: CH 4.4
Reviewing Formatting for Consistency
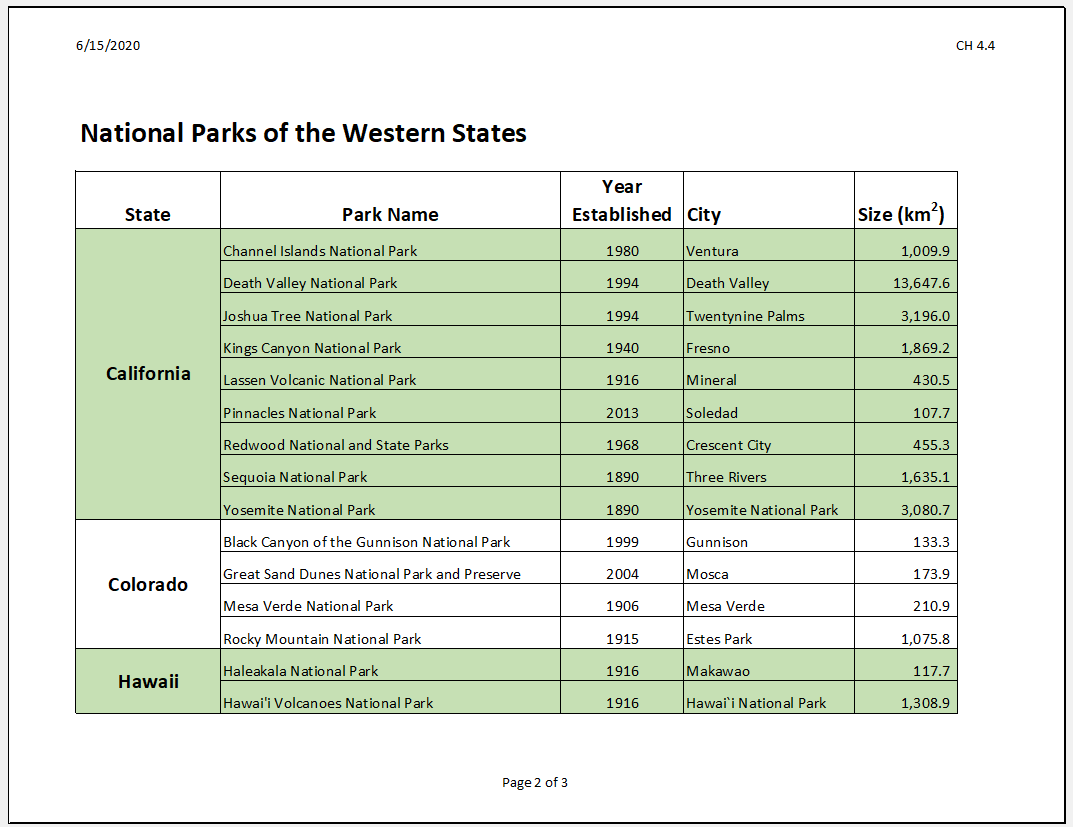
You have been given a workbook with data about the national parks in the western United States. Your coworker formatted the workbook and has asked you to review it for consistency. You also need to prepare it for printing. Figure 4.27 shows how the second page of the finished worksheet should appear in Print Preview.
Reviewing Formatting for Inconsistencies
To hone your eye for details, which are important in presenting data. The first thing you are going to do is review the National Park Size worksheet for formatting inconsistencies.
- Open the data file named CH 4.4 and use the File/Save As command to save it with the new name CH 4.4 National Parks.
- Scroll through the worksheet and locate the FIVE (5) formatting errors and correct them.
- While you are fixing errors, proofread the sheet and correct any typos.
- Change the orientation to Landscape.
Repeating Column (and Row) Labels
Now that you have fixed the cell and text formatting, you are ready to review the worksheet in Print Preview. You will notice that the worksheet is printing on multiple pages, and you cannot tell what each column of data represents on some of the pages.
- With the CH 4.4 National Parks file still open, go to Backstage View by clicking the File tab on the ribbon. Select Print from the menu.
- Click through each of the pages. The worksheet is currently printing on four pages, with the City and Sizes columns printing on separate pages from the rest of the data.
- Change the Orientation from Portrait to Landscape. This fits all of the columns on one page.All of the columns are now on the same page, but the second and third pages have no column labels to identify what information is in each column. You are going to use Print Titles to repeat the first three rows of the worksheet on each of the printed pages. To set Print Titles you need to exit Print Preview.
- Exit Backstage View then click the Page Layout tab on the ribbon.
- Click the Print Titles button in the Page Setup group on the ribbon. The dialog box shown in Figure 4.28 should appear.
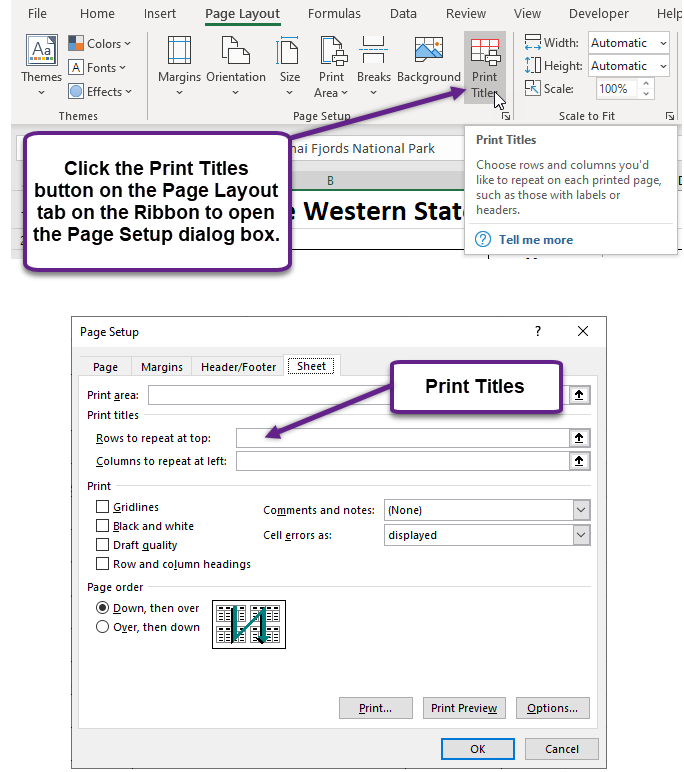
- Click in the Rows to repeat at top: box. Be sure your insertion point is blinking in that box before moving on to the next step.
- In the worksheet, select Rows 1 through 3. The text $1:$3 should now appear in the Rows to repeat at top: box.
- Click OK.
You will not see a change to the worksheet in Normal view, so you will need to return to Print Preview. While looking in Print Preview, you will notice that the pages are breaking in inconvenient places.
- Go to Print Preview and look at each of the pages. Notice that the first three rows are now repeated at the top of each page.
- Exit Backstage View.
Skill Refresher
Creating Print Titles:
- Open the Page Setup dialog box and click the Sheet tab.
- Click in the Rows to repeat at top: box or the Columns to repeat at left: box.
- Click in the worksheet and select the row(s) or column(s) that you want to repeat on each page.
Inserting Page Breaks
Notice that the data for California is split between the first and second pages. You want all the data for each state to be together on the same page, so you need to control the page breaks. You are going to start by inserting a page break before the California data to force it to start on the second page, then you will move the page break for the third page if needed. To make these changes you are going to work in Page Break Preview.
- Click the View tab on the ribbon then click Page Break Preview in the Workbook Views Group. Your screen should look like Figure 4.29.
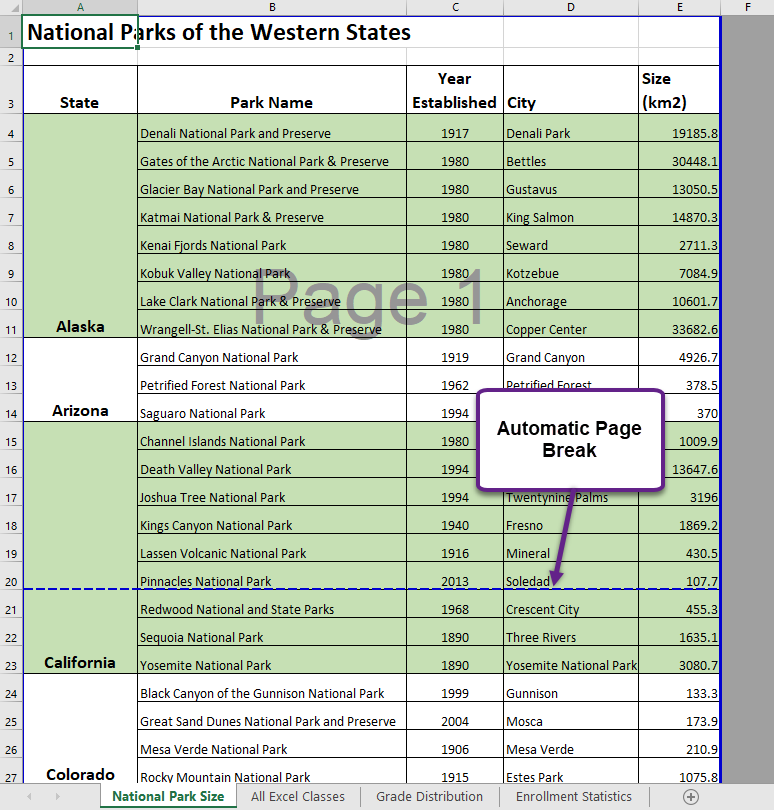
In Page Break Preview, automatic page breaks are displayed as dotted blue lines. Notice the dotted blue lines after rows 19 and 35. These lines indicate where Excel will start a new page. For this worksheet, you want the first page to break before the California data, so you are going to insert a manual page break.
- Select cell A15. When inserting a page break, you select the cell below where you want the page break to appear.
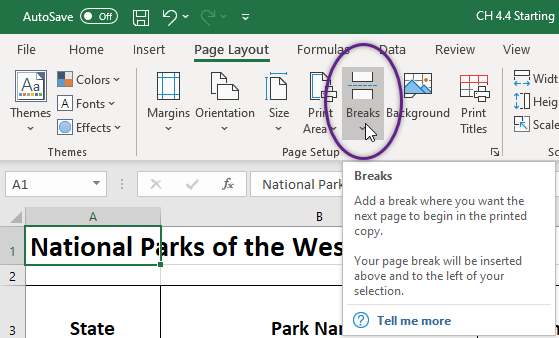
- Click the Page Layout tab on the ribbon.
- Click the Breaks button in the Page Setup group (see Figure 4.30).
- Select Insert Page Break from the menu. There is now a solid blue line after row 14, which indicates a manual page break that was inserted.
- Go to Print Preview. Notice that the California data now starts on the second page.
While looking at each page in Print Preview you decide that the third page should start with Montana. To make this change you are going to move the automatic page break that appears after Nevada.
- Exit Backstage View. Switch back to Page Break Preview if needed.
- Locate the next dotted blue line (automatic page break).
- Put your pointer over the dotted blue line and it will switch to a vertical double-headed arrow. Click on the dotted blue line and drag it above Montana.
- Release the mouse button when the line is above row 30 (above Montana). The line will now be a solid blue line, indicating a manual page break.
- Go to Print Preview. The Montana data now appears at the top of the third page.
While evaluating the pages in Print Preview you decide that there is too much white space at the bottom of the pages. To fix this, you are going to center the contents vertically on the pages.
- Click the Page Setup link at the bottom of the Settings section of Backstage View to open the Page Setup dialog box.
- Click on the Margins tab.
- In the Center on page section, check the box for Vertically then click OK.
- Review each page in Print Preview to see the changes. Exit Backstage View.
Preview Remaining Worksheets for Printing
There are four remaining worksheets to be reviewed. Some of them will need minor changes and some will not need any changes. You will need to preview each one and then make the specified changes. In the following steps you will preview and modify the next three worksheets.
- All Excel Classes – this is a chart sheet, so it should not need any changes.
- Grade Distribution – the chart is split across two pages. Fix this by changing the orientation (Landscape) and scaling (Fit Sheet on One Page).
- Enrollment Statistics – The data shows up on two pages. Fix this worksheet for printing also.
